
This article explains how to add a Visio file to SharePoint that contains links to supportive information created in Runthru Instruction.
Video
HTML
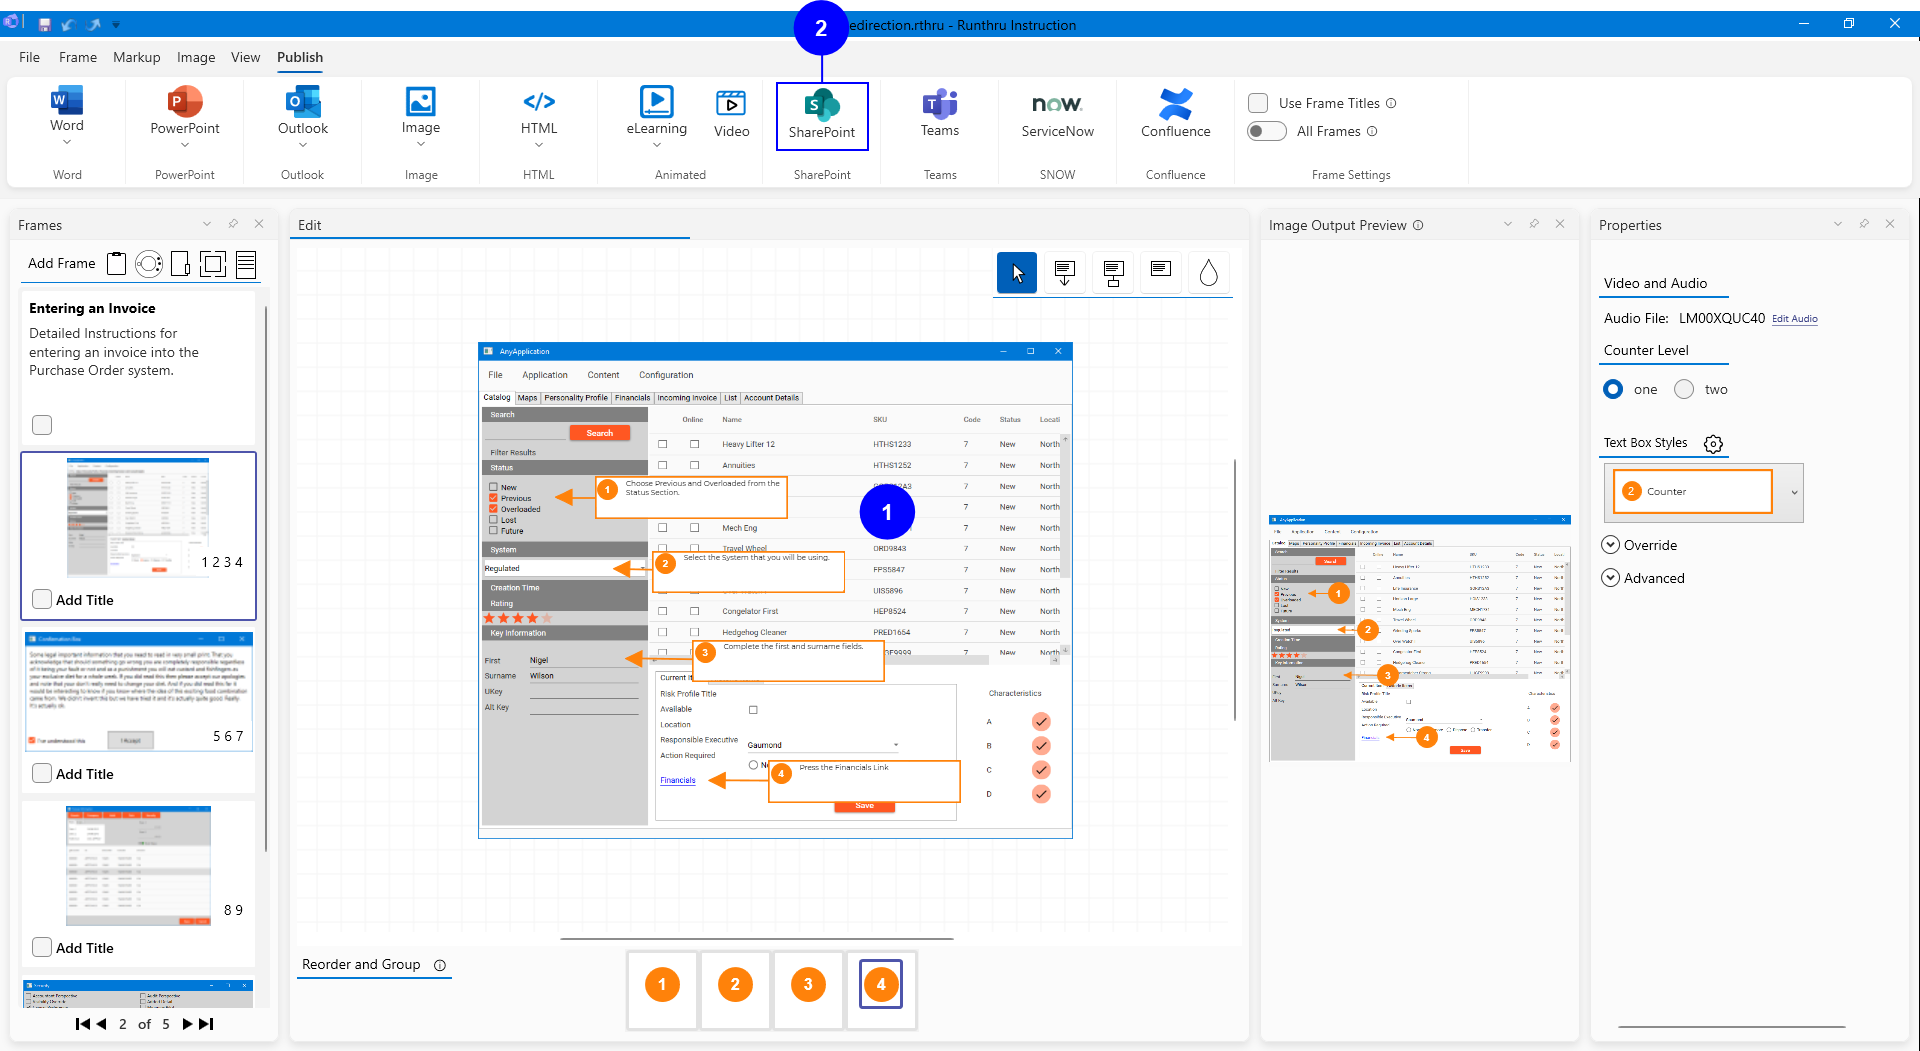

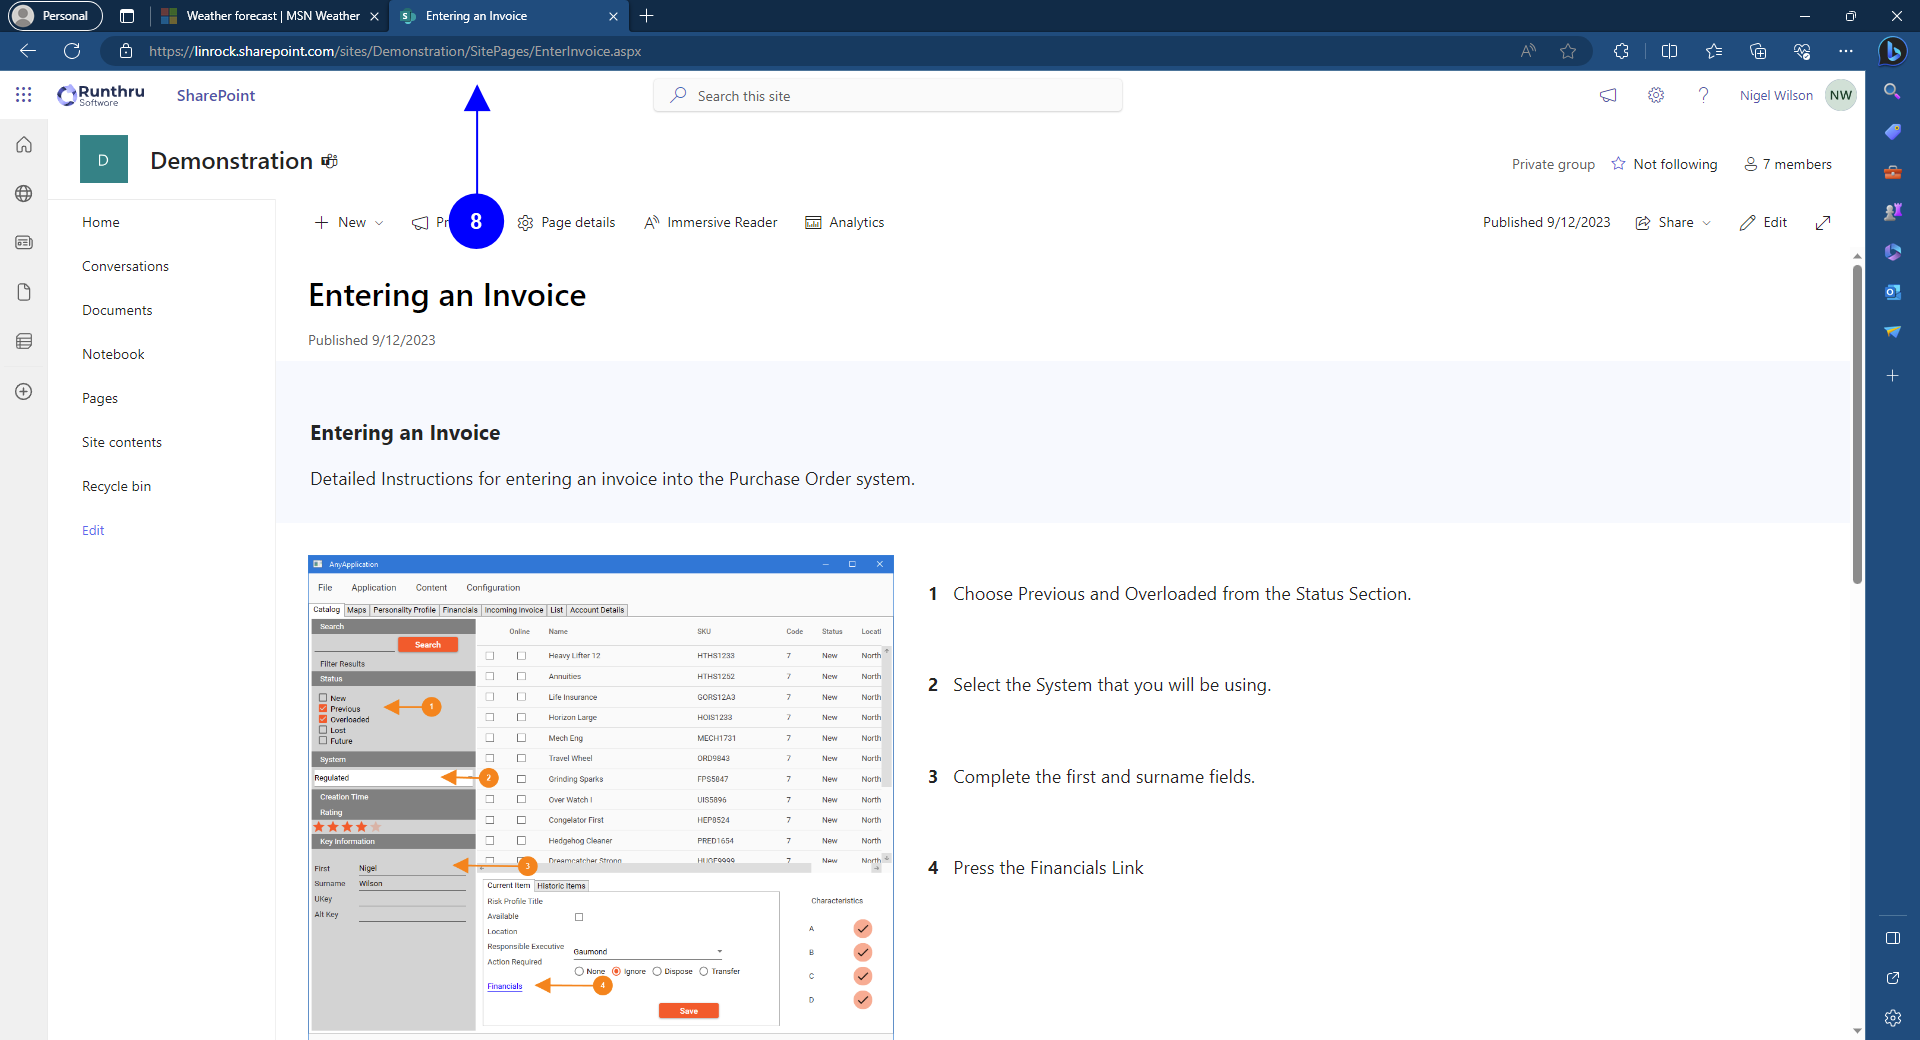
We start with a Runthru Instruction file entitled Entering an Invoice.
This is detailed information that will be referenced from a step in a flowchart.

Pressing the SharePoint publishing button, displays the SharePoint publishing options.

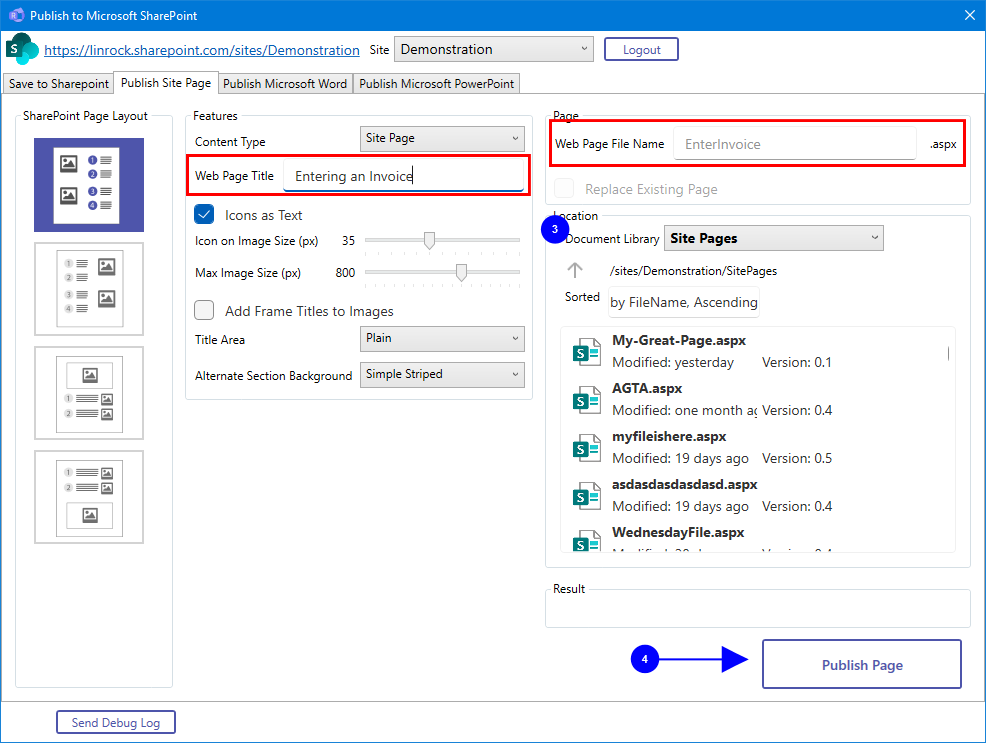

From this dialog box we can directly create a page in SharePoint.
Here we add in a title and file name.

Pressing the Publish button, will create the page.
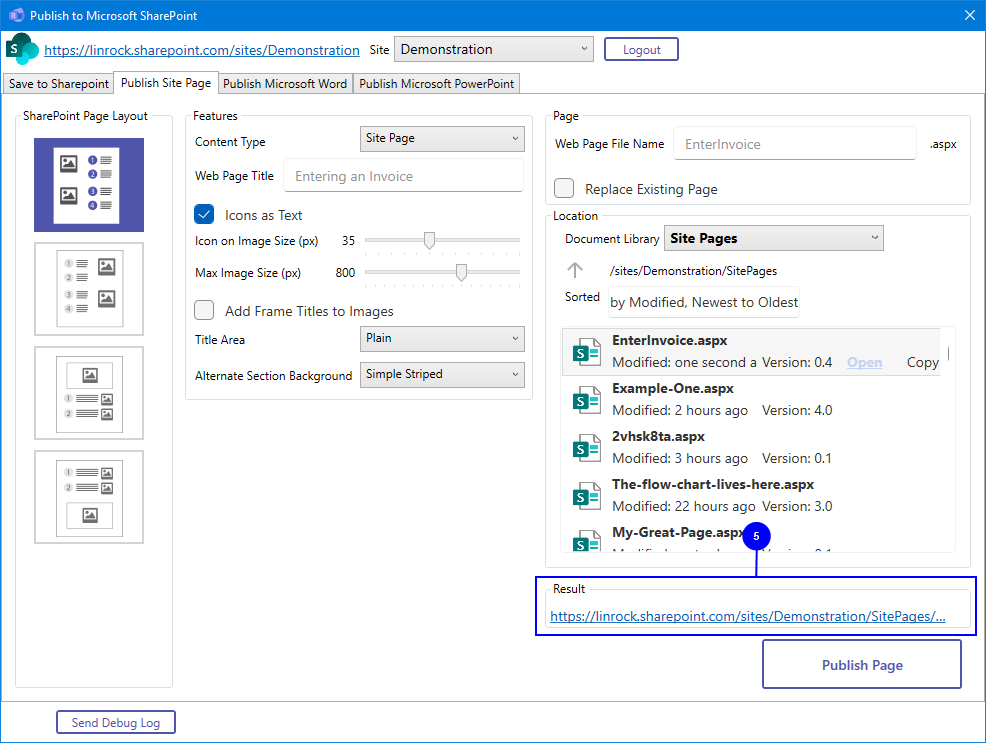

Once the creation of the SharePoint page is complete, you can click this link to show the new page.

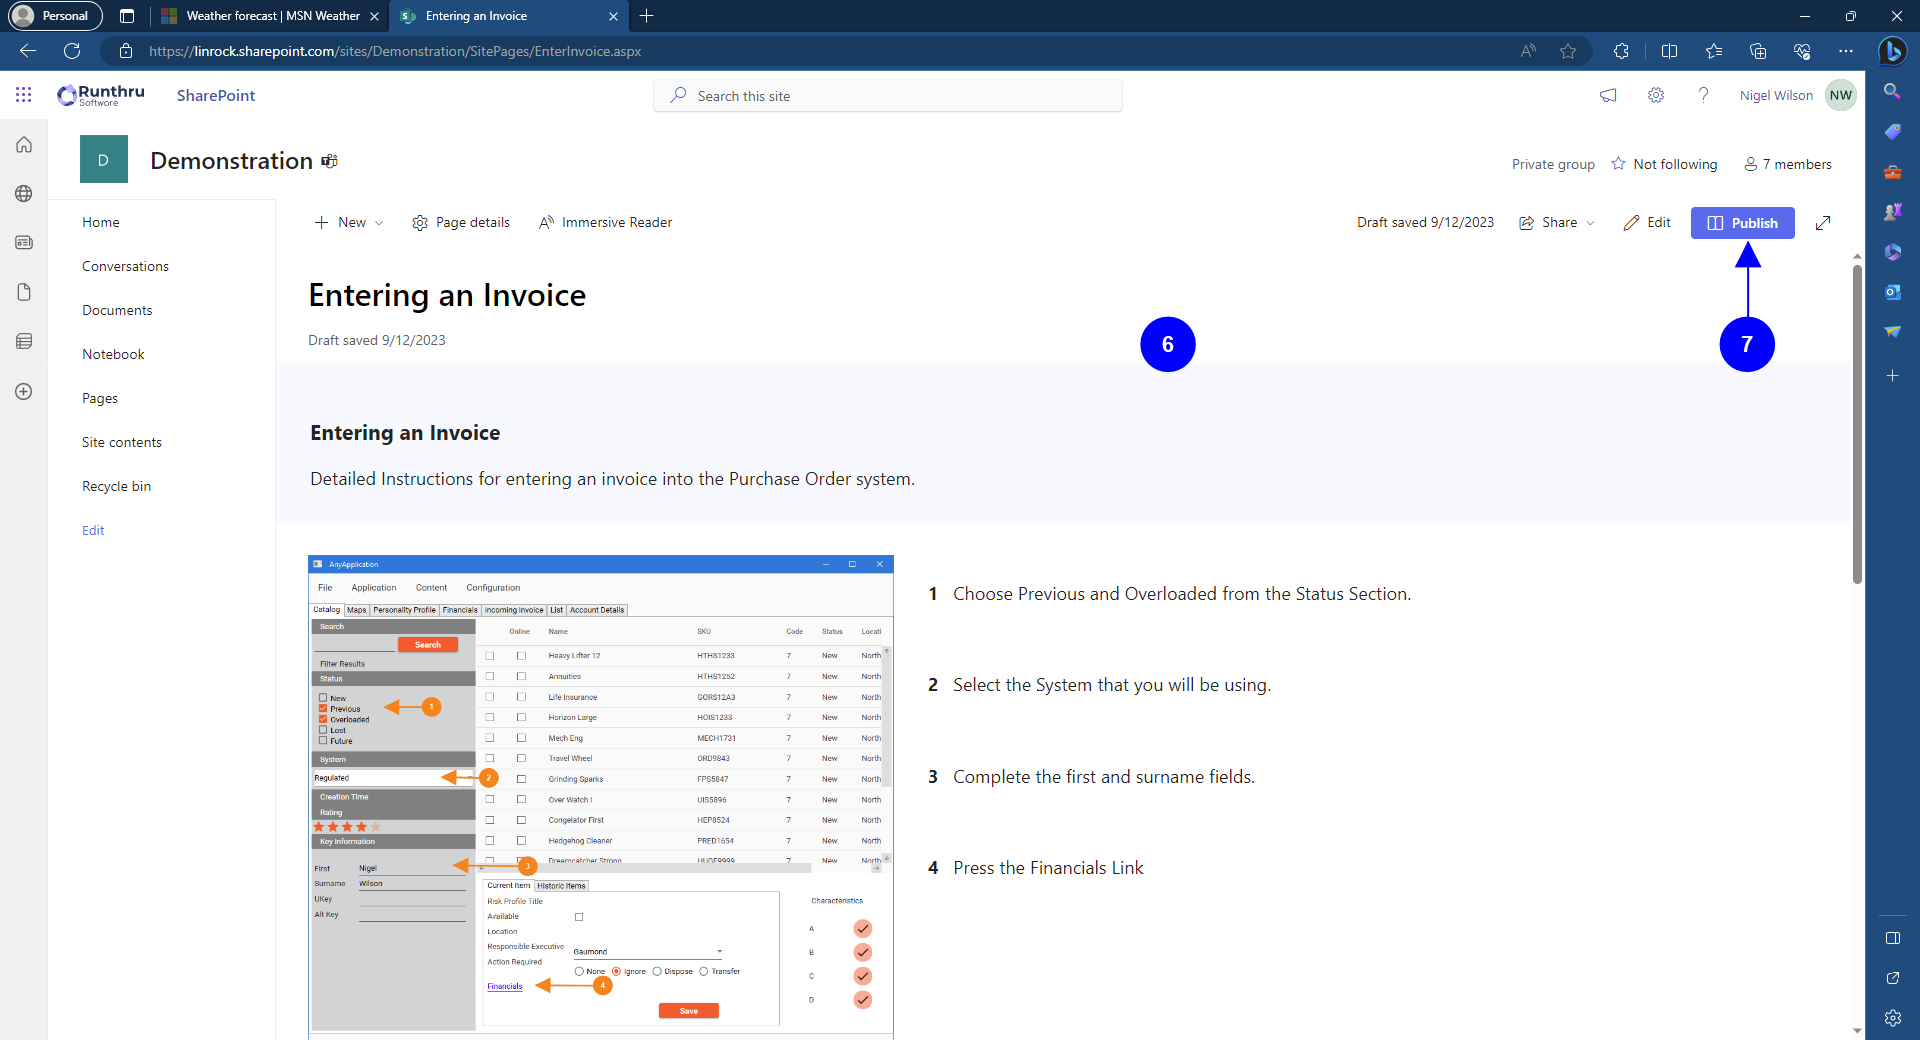

Here is the page that was created.

To make the page available to others, click the Publish button.

You should copy the URL to the clipboard as you will need it shortly.
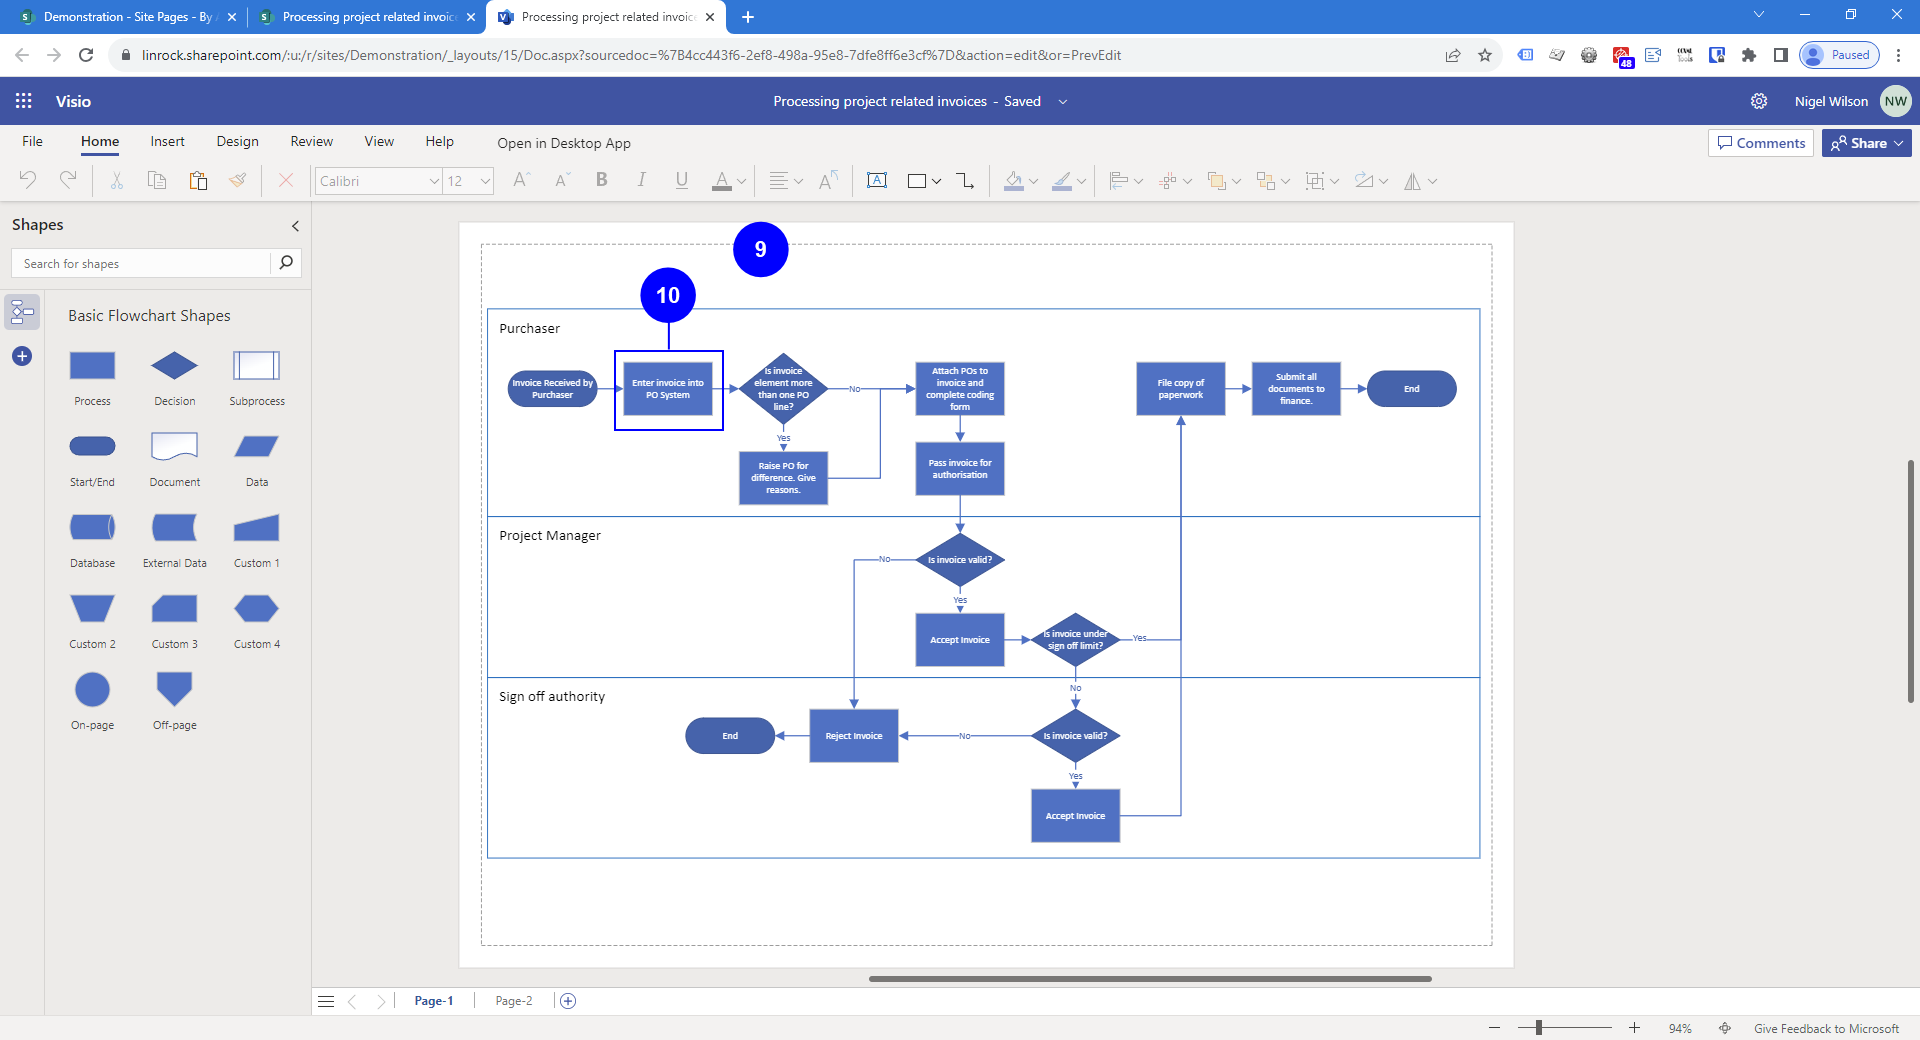

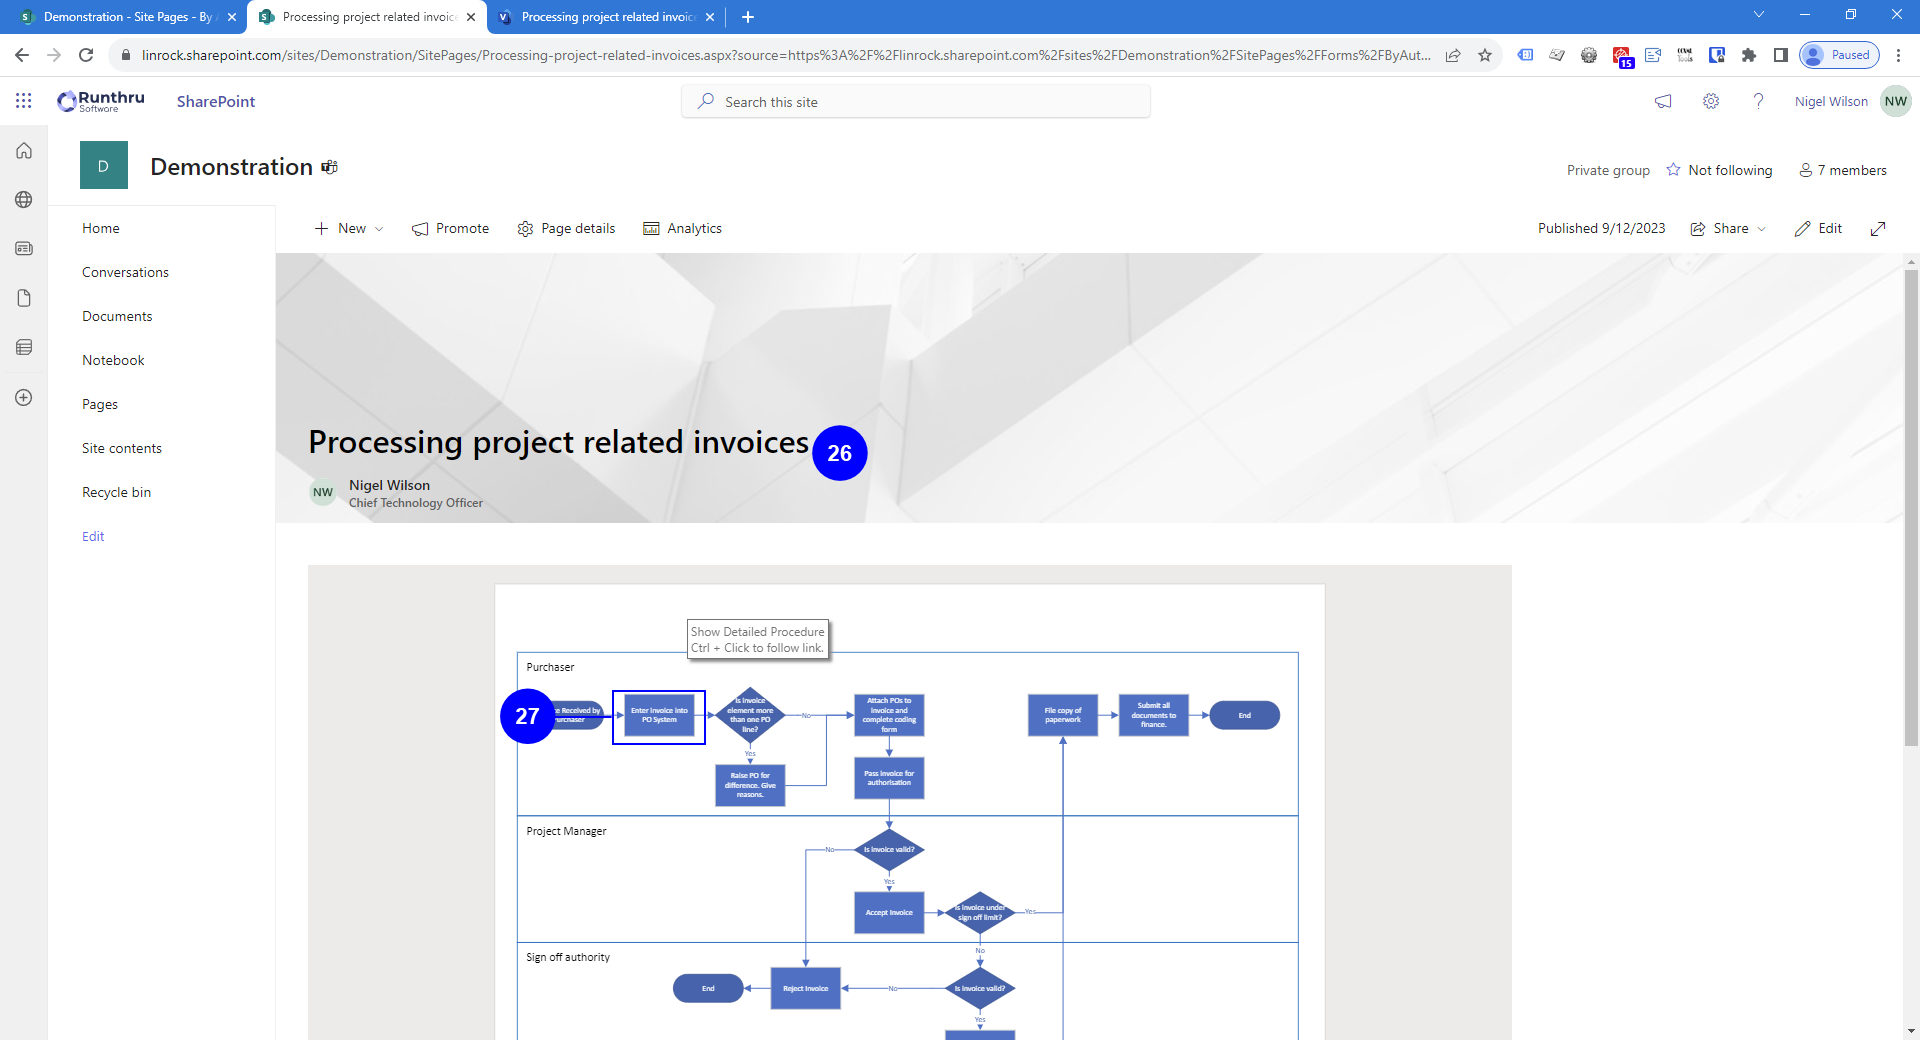
This is a Visio file saved in SharePoint.

We will provide a way for the user to get to more detailed information about this step if desired.
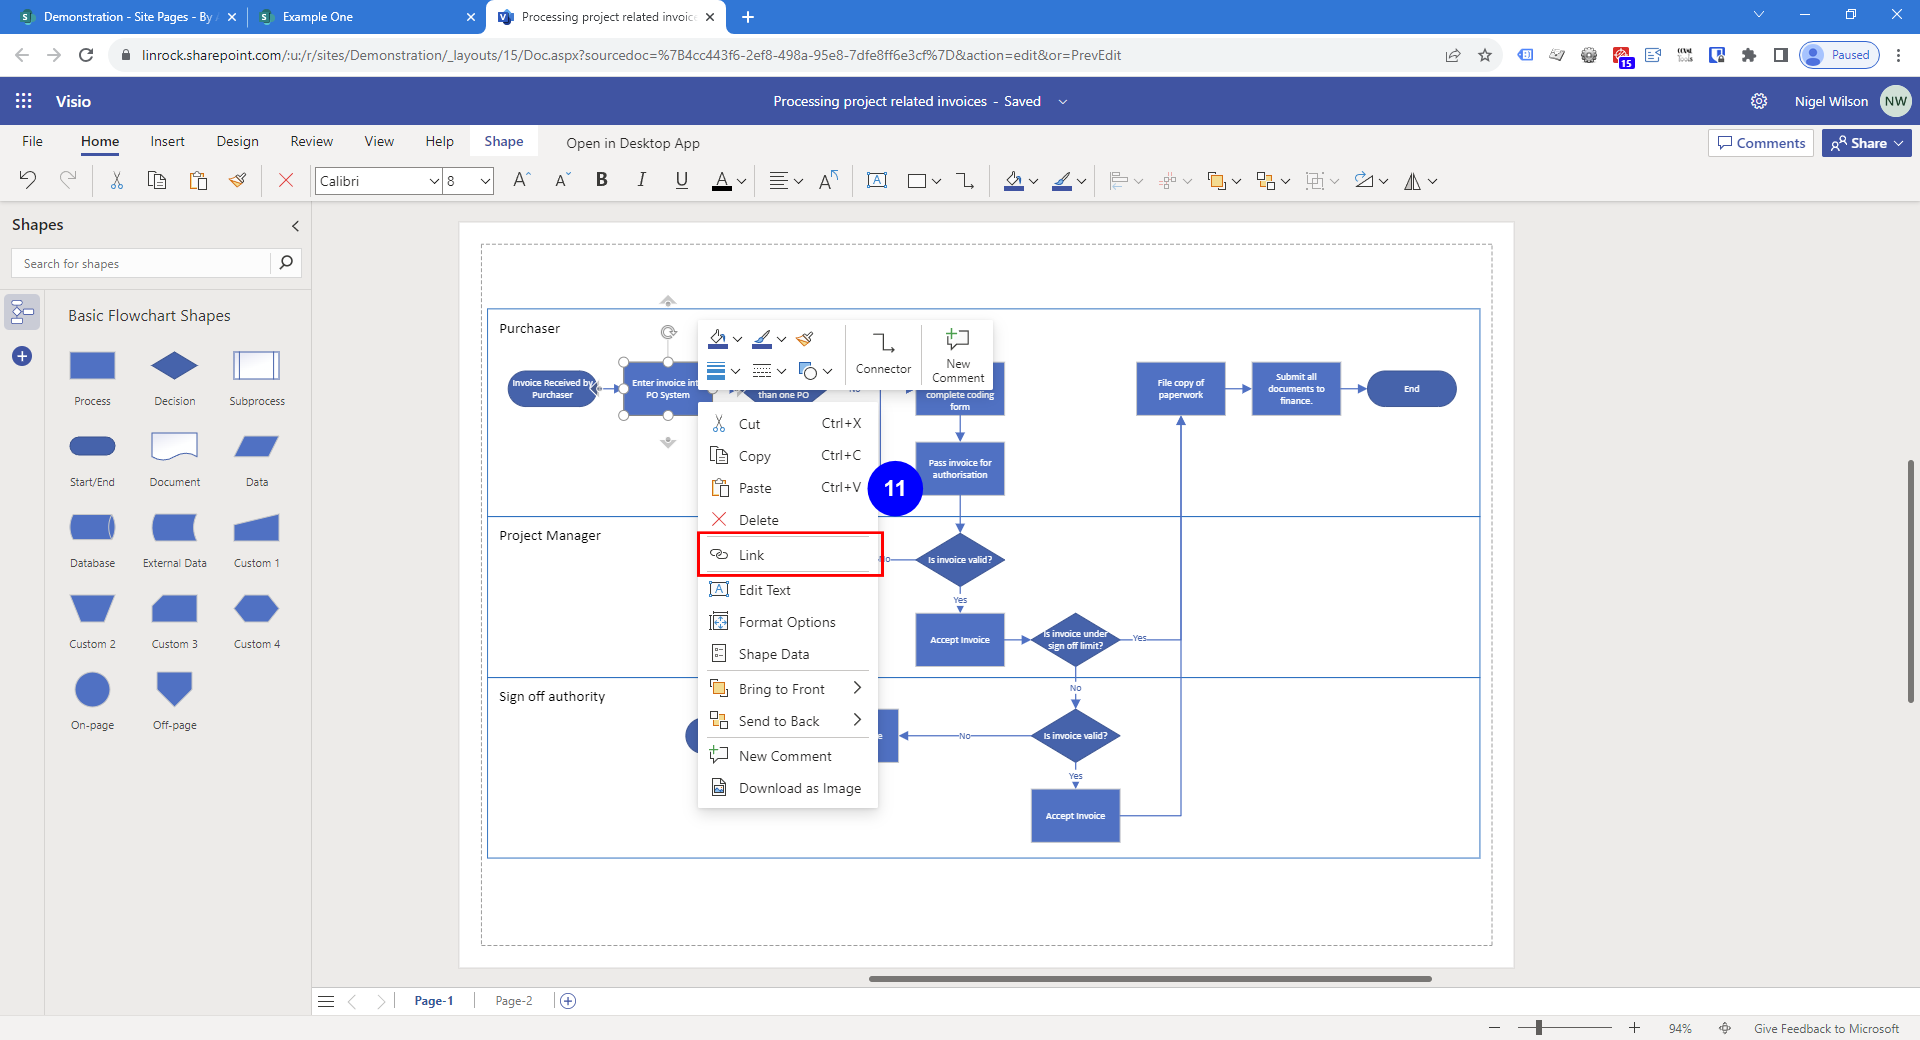

Right clicking on this step will show this menu. Selecting the Link item will show the options that we need.
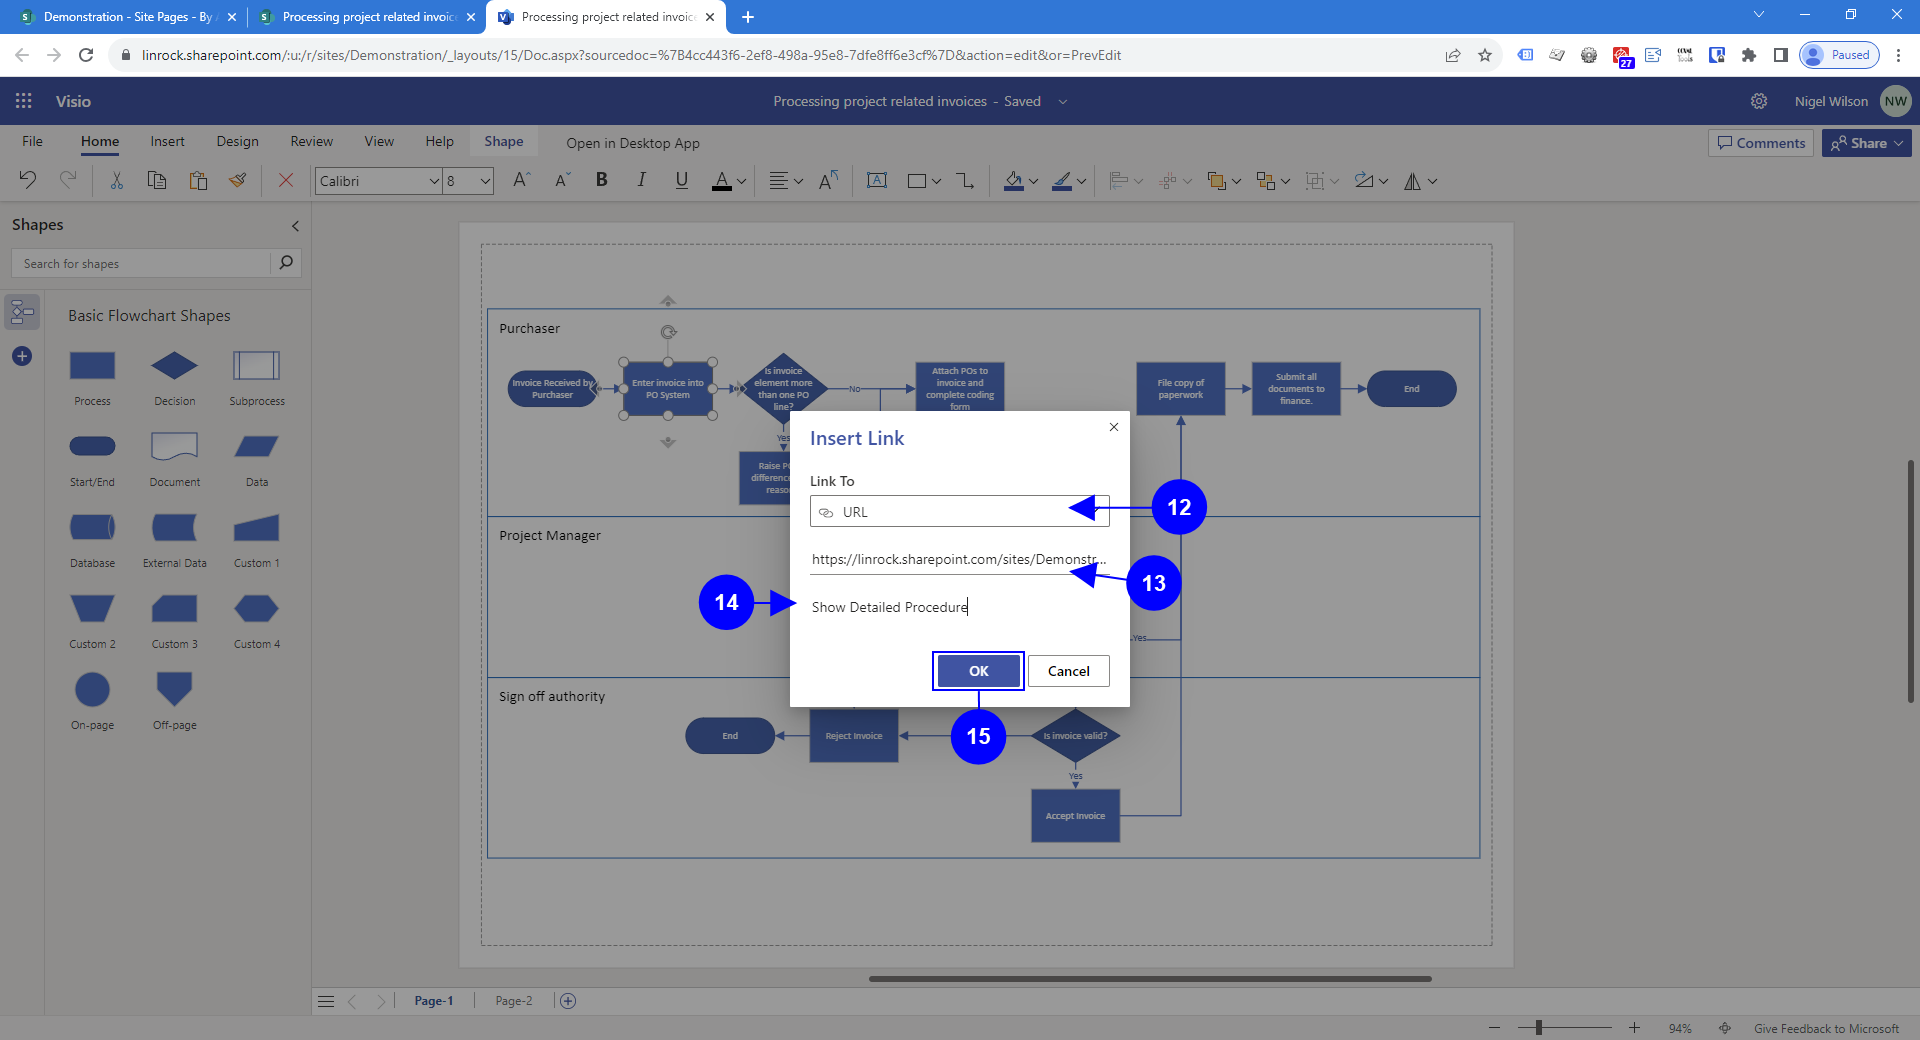

This is the Insert Link dialog box.
Make sure that this first option says URL.

Paste the URL for the target page here. This is the link that you copied earlier.

You can enter some descriptive text here, if desired.

Press OK to continue.

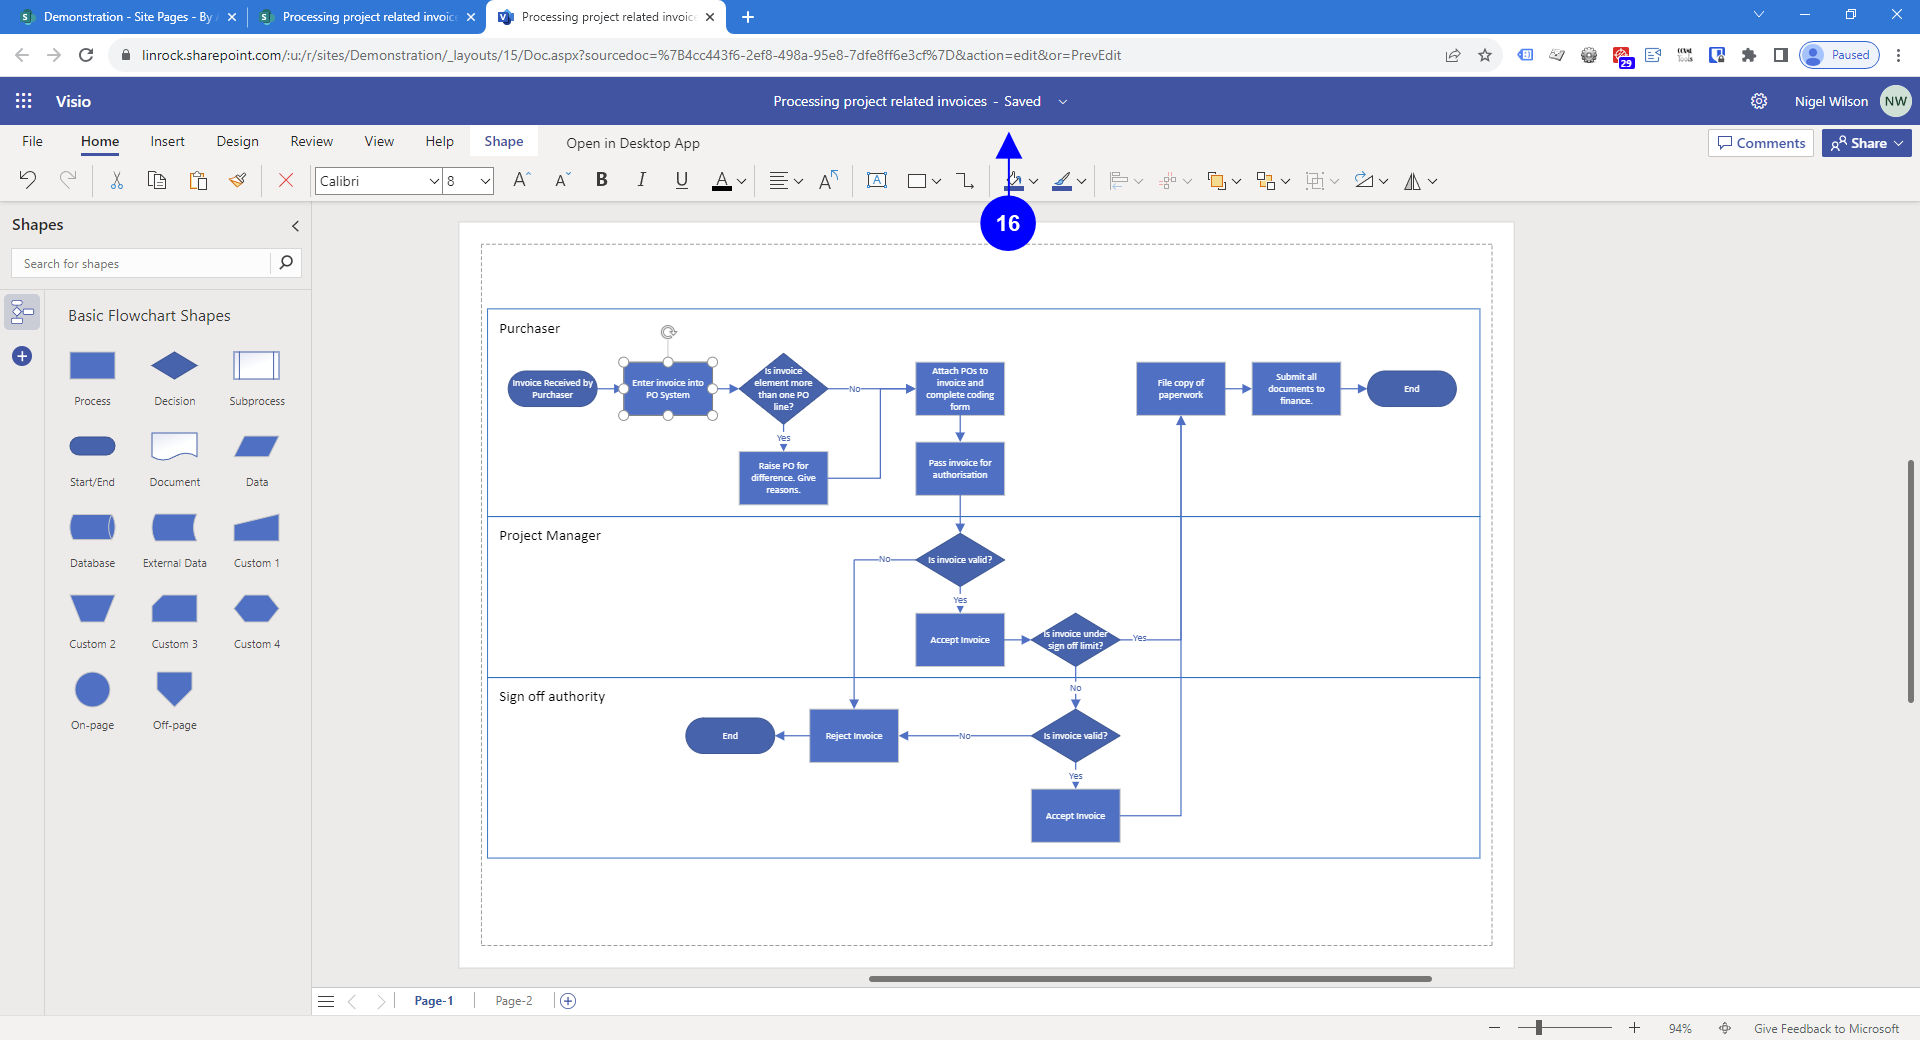

Your file should automatically save.

Returning to SharePoint we'll now create a new page. Into that page we will add our visio flowchart that includes the new link.
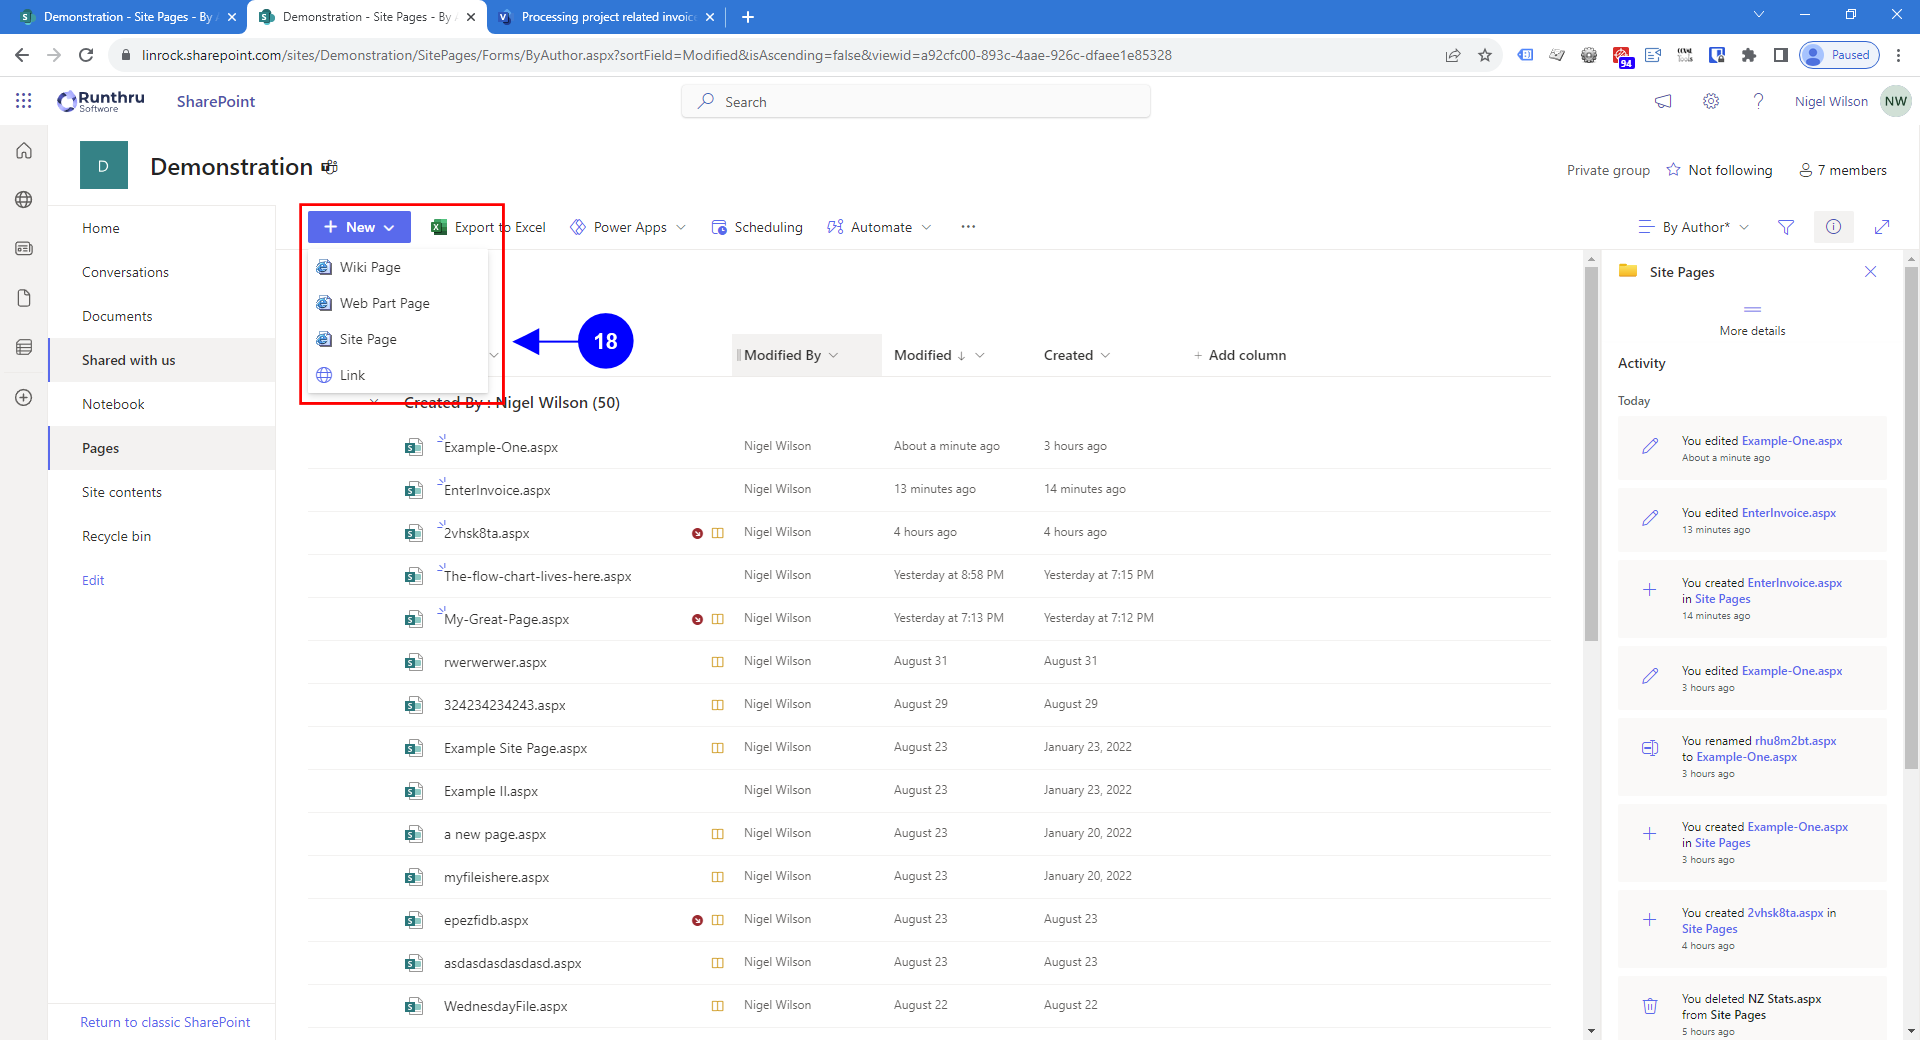

Create a new site page from this menu.
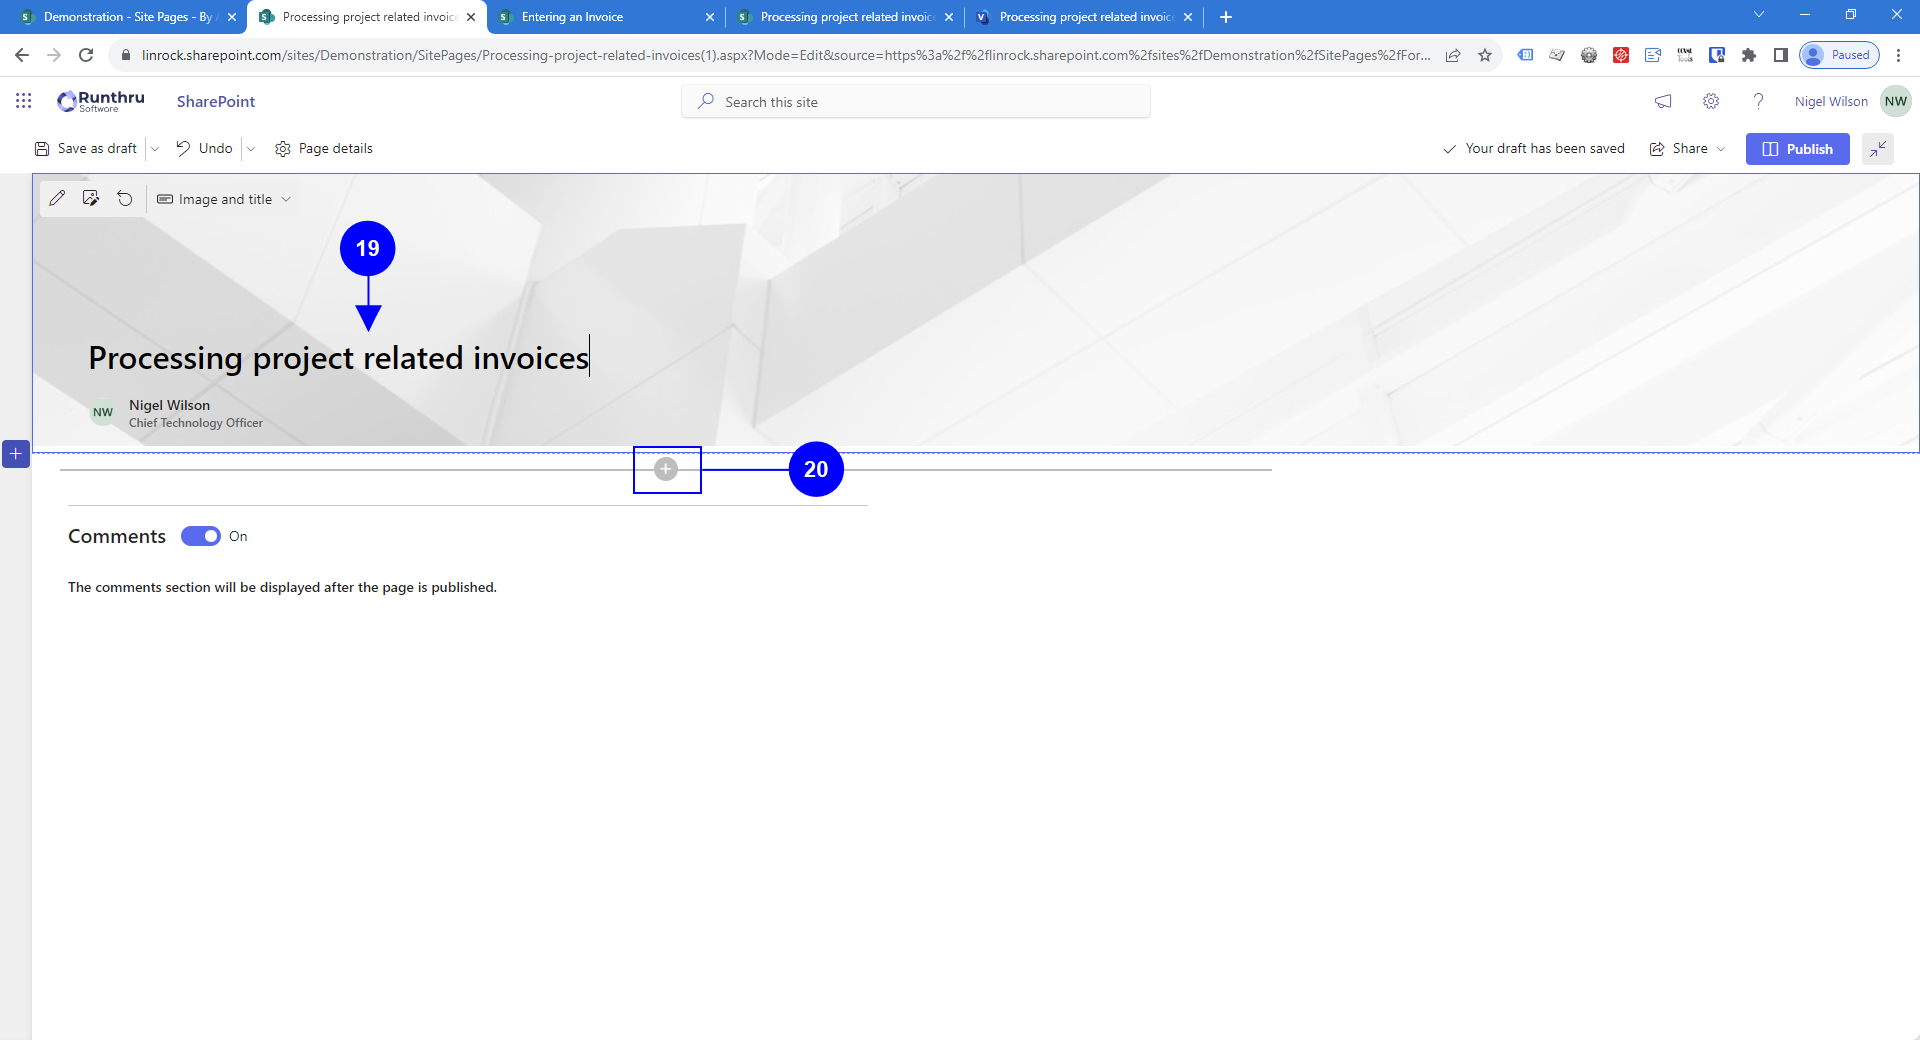

Enter a title for your page.

Click the Add a Web Part button. If you do not see the button, move the mouse to this location on the screen and it will appear.

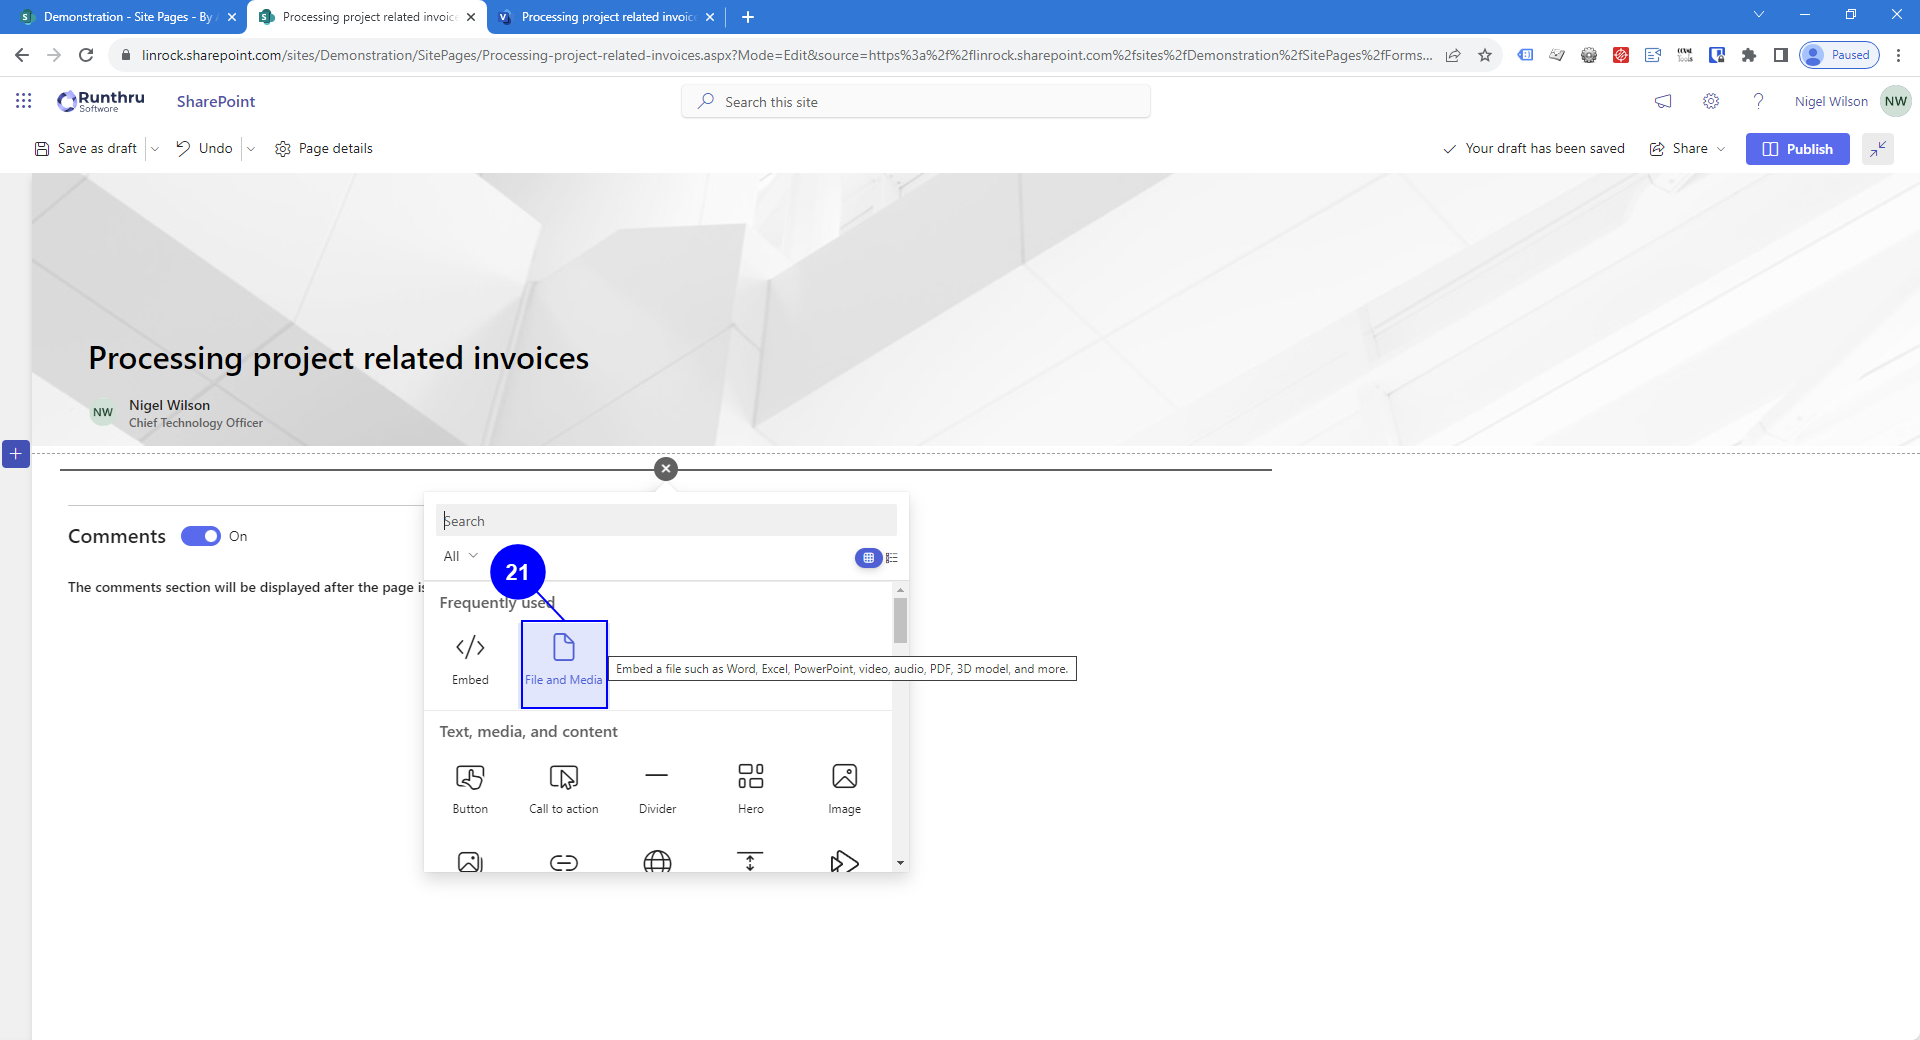

Press the File and Media option.

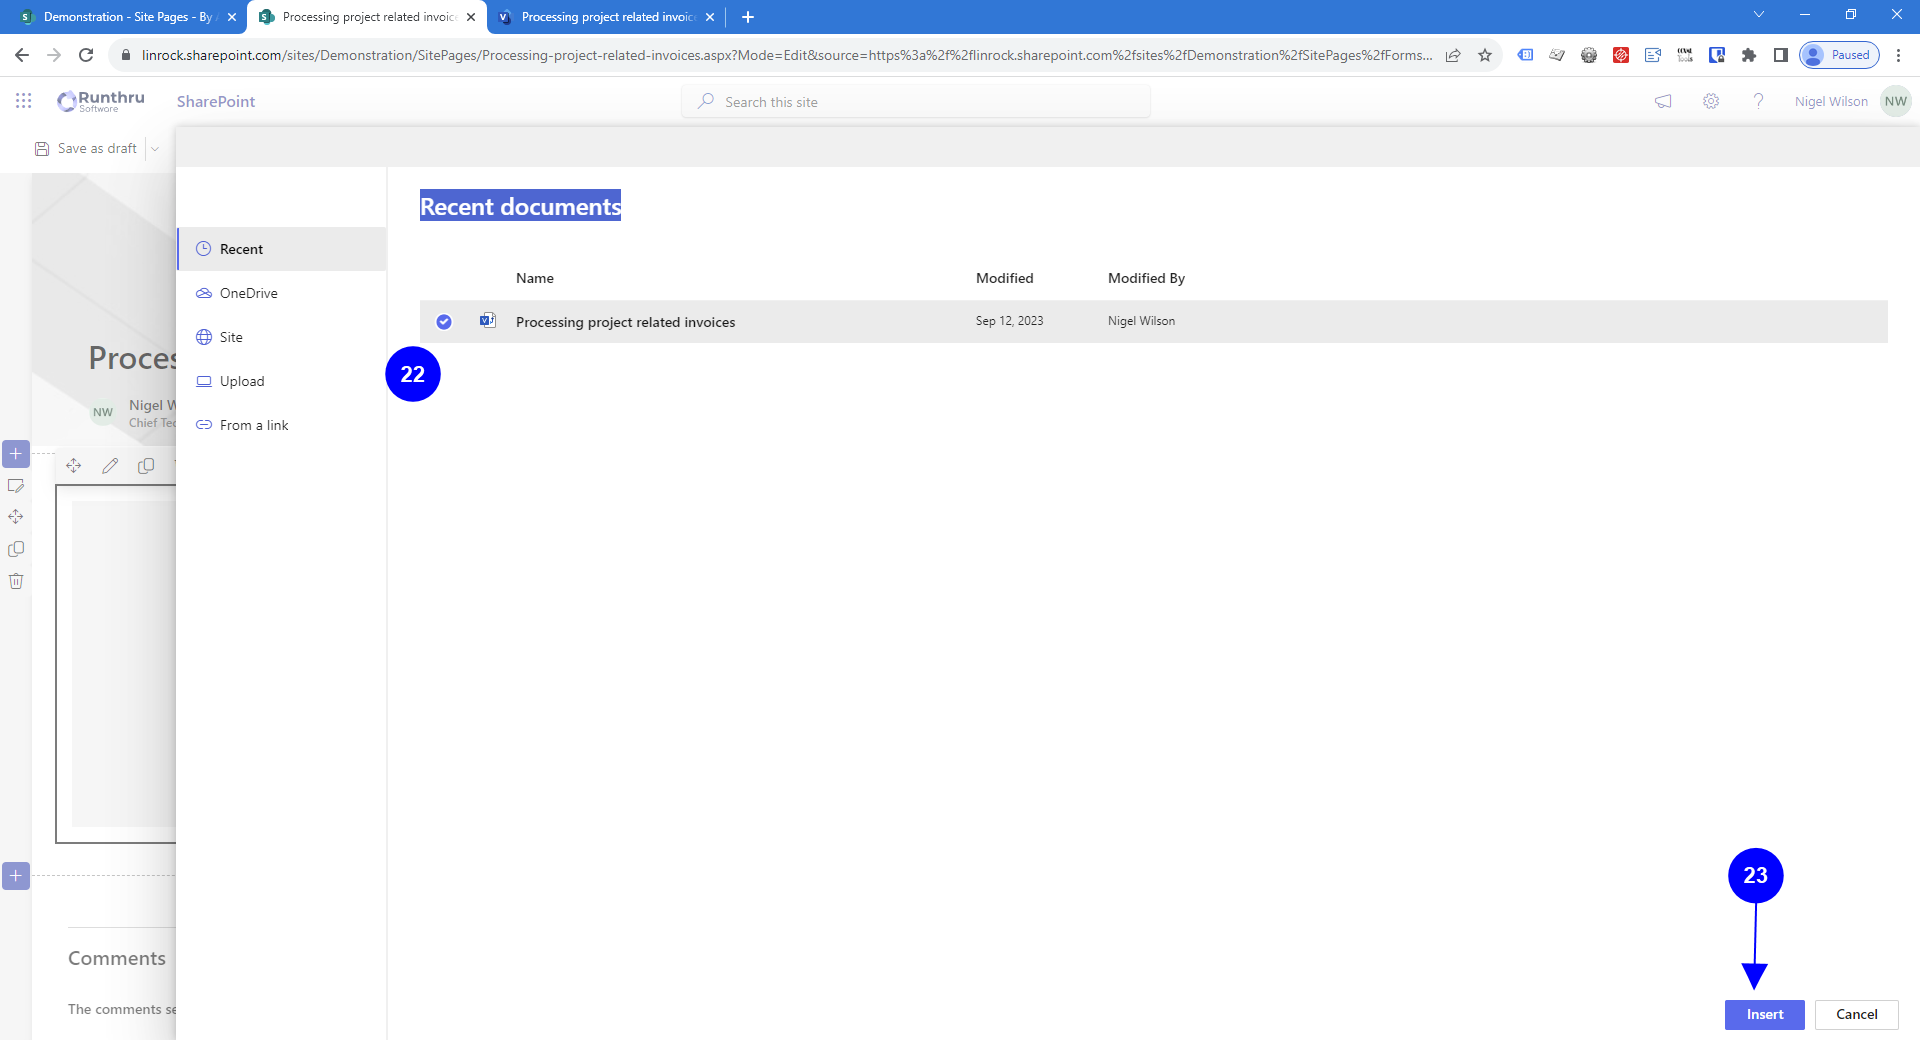

Find your visio file and select it.

Once selected, the Insert button becomes active. Press the Insert button to continue.
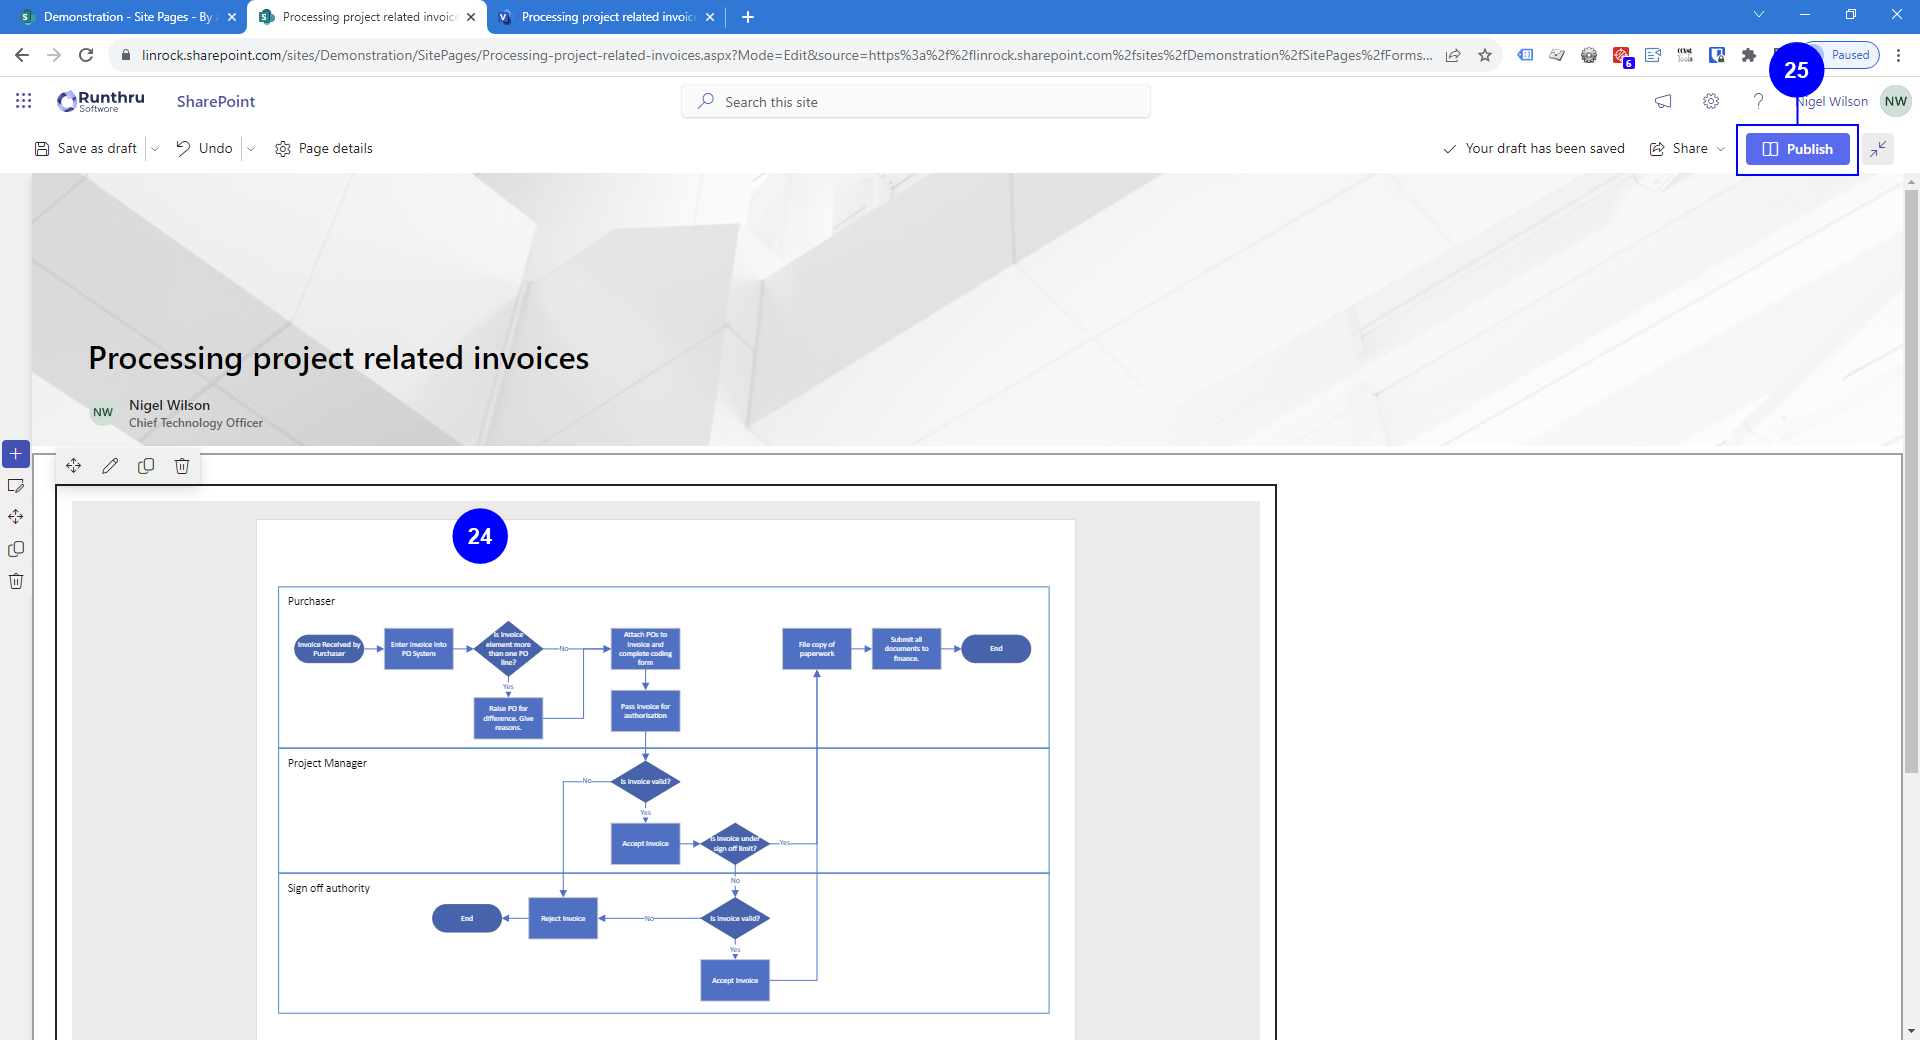

Your visio file is now shown in the SharePoint page.

Press Publish to make the page available to others.


The published page is now shown.

Moving your mouse over this step in the flowchart will now show that a control click will open your page containing the step by step information.

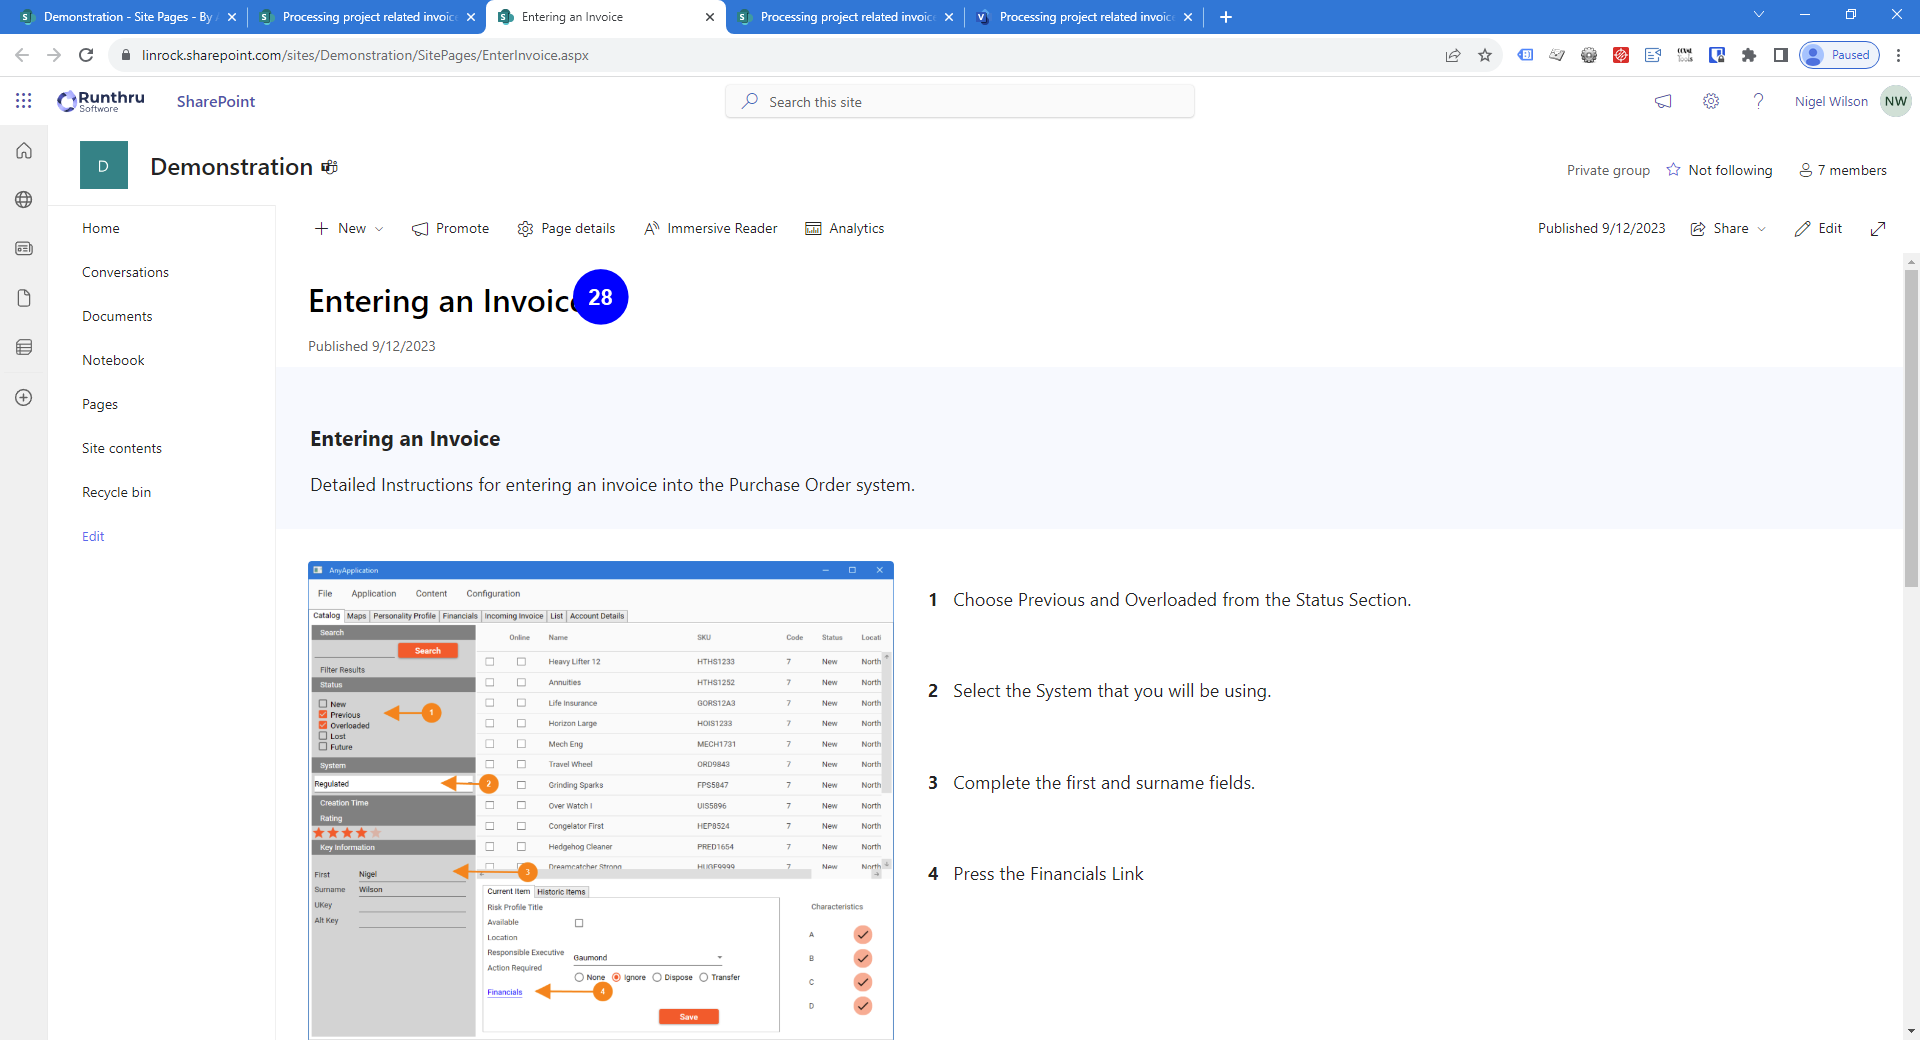

This is the details page that is shown when the user makes use of the link.
Summary
Using a Runthru Instruction file we published a clear instructional procedure, to SharePoint. We then added a link to that procedure to a step in Visio. That Visio file was then included in a SharePoint page. The result being a process flowchart, with a step linked to a detailed procedure.