
Themes, Styles and Templates
This article describes how to edit the default visual appearance of markup elements, and outputs of the software.
About Themes, Styles and Templates
A Theme in Runthru Instruction contains multiple markup Styles and a collection of Templates. You need to choose a Theme when you make a new file. The Theme sets up the visual and layout standards for the file including the colours and fonts.
When you create a new file, the Theme copies the Styles into the new file and they are kept there. The important point here is that the file now controls its own styles, and is no longer connected to the original Theme.
When you draw a markup element on a screenshot, it will use the default Style to display it on the image. Each style defines the font, box colouring, line colours, thickness, and other characteristics. Each file will have multiple styles and you can apply any of those styles to a markup element.
A Template, such as a Word template, is used when the file is published. Unlike Styles, they are not part of the Runthru Instruction file. The template controls elements such as the header and footer. Templates are used for Word, PowerPoint, HTML, eLearning, video, and all the integrated outputs. When you create a new file. the Theme tells the file the location of the Templates.
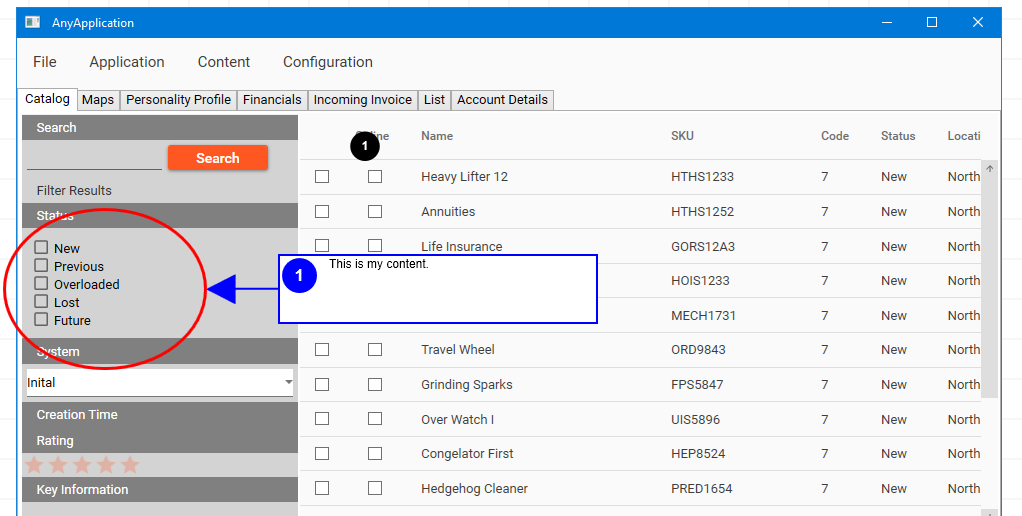

This is a screenshot with elements. The numbered box is a Markup element. The Arrow is an Attached Tool. The Ellipse is a Drawing or Shape element. These terms are important when editing Styles.
Styles
This section contains information on how to edit Styles.
To edit Styles and Templates, navigate to File > Styles and Templates

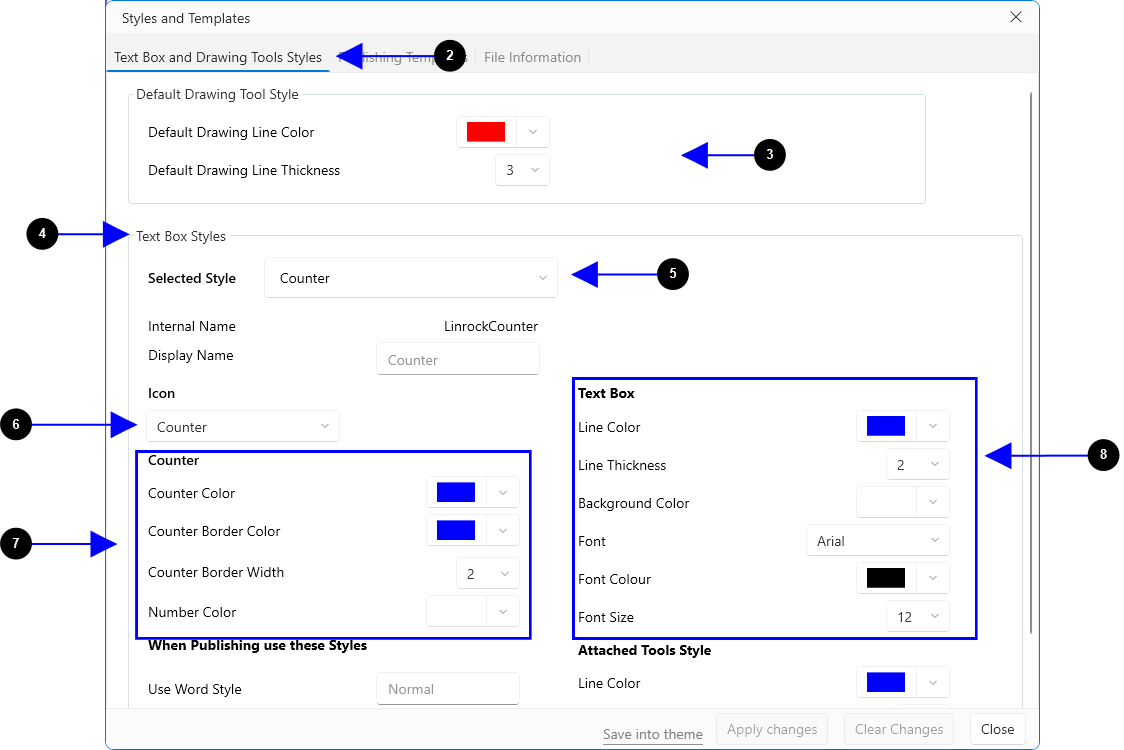
Select the first Tab

This is the Default Drawing Tool Style section. This allows you to set the default colour and line thickness for Ellipses and other Shape tools.

Text Box Styles allows you to set characteristics for each of the different Styles.

You select a Style to edit from this list. The default style is called Counter.
Under this choice are all the characteristics that you can control for the selected Style.

You can choose a different Icon for each style. If you want a step with a number, then you must choose Counter here.

If Counter is selected in the previous step, you can change visual characteristics of the Counter here.

In the Text Box section, you can control visual characteristics of the Markup element.
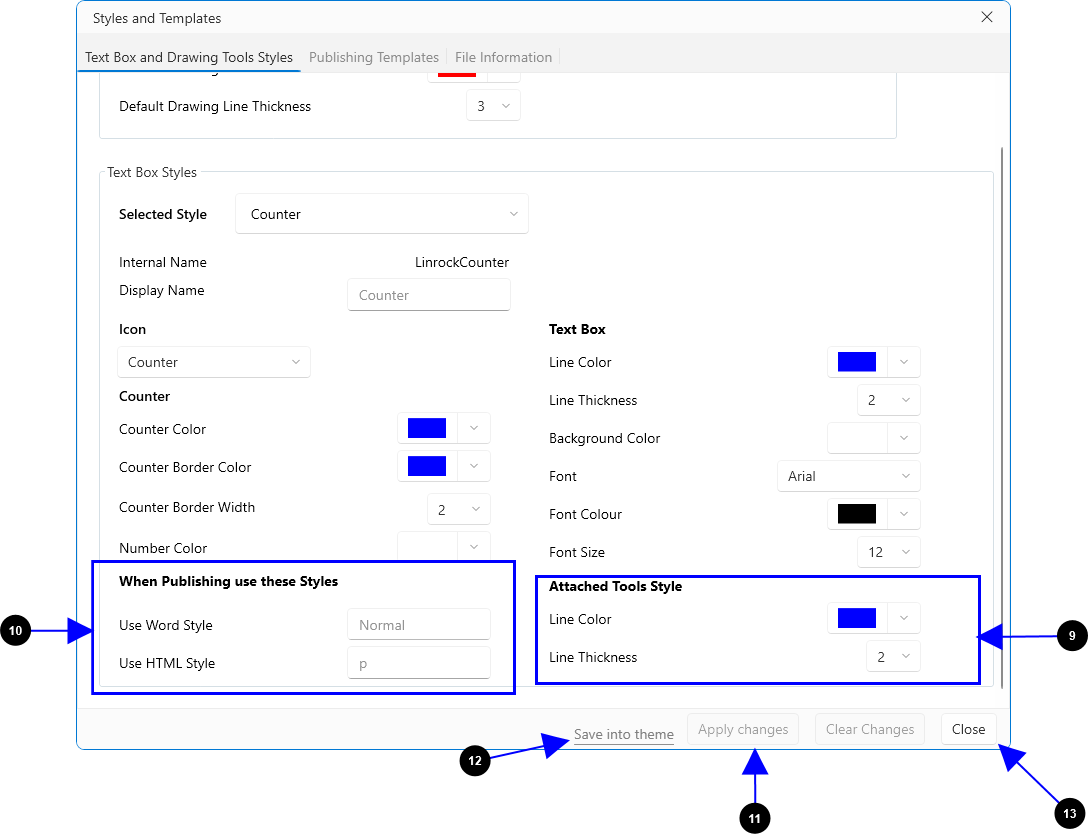

In the Attached Tools Style section, you control the colour and thickness of the attached Arrow and Area tools for the selected Style.

In the When Published... section you have the opportunity to choose, for this Style, the matching styles in Word and HTML.
This is an important feature to understand.
When publishing to Word, Runthru Instruction will automatically use the Word Style named here for formatting your output, and not the Font described in the Text Box section in this window.
This allows you to format the same content differently for different output types.
Similarly, the choice you make here for HTML will tag your content with the HTML Style when you create that output.

Once you have completed the changes for this Style, you can press Apply Changes to save them for this file.
You can now change Selected Styles to edit another Style, by repeating the previous steps, or you can continue.

Once you have applied your changes, this link will become available, and you can choose to save your changes into the Theme.
Note that the changes you make to a Theme will only be used when you create a new file.

Pressing Close will close this Window and the changes will be visible automatically.
Templates
Templates do not exist inside the Runthru Instruction file. The file, however, has a record of which templates to use. You can find, change and open the files for editing inside of the application.
This section contains information on how to find, swap and edit Templates.
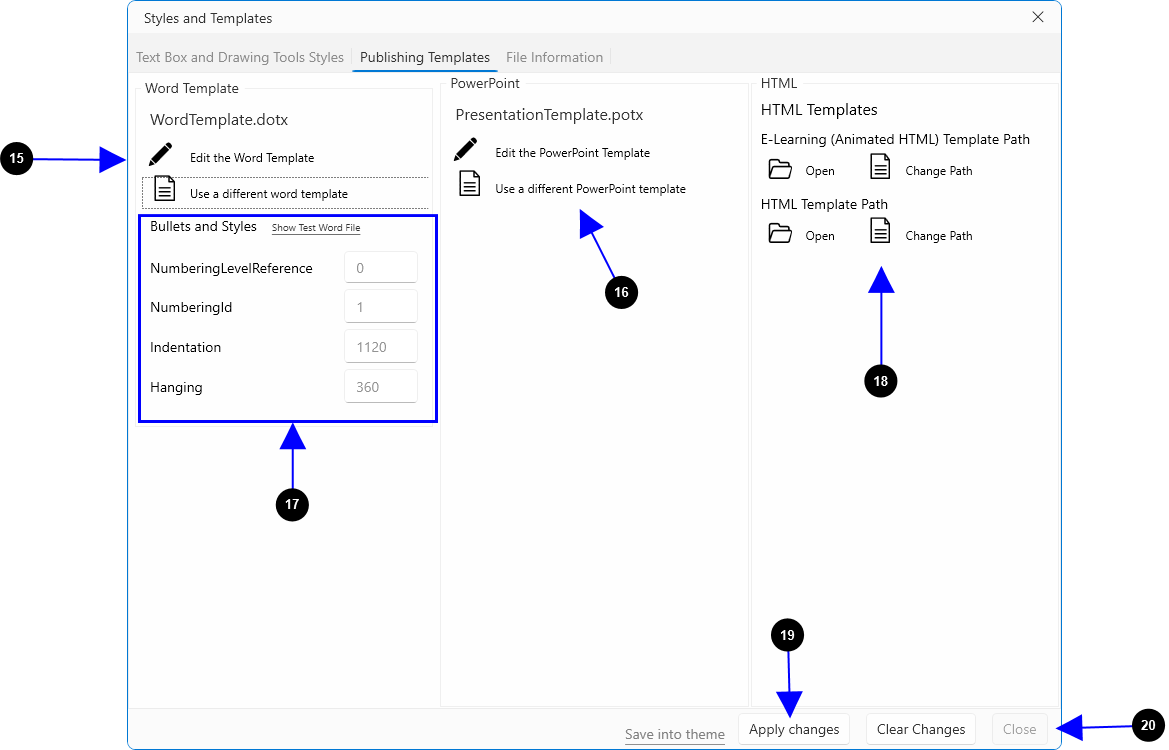

To edit Templates, navigate to File > Styles and Templates

You can choose to open and edit your Word template, or you can change to a different Word template here.

You can choose to open and edit your PowerPoint template, or you can change to a different PowerPoint template here.

This section relates to bullet point formatting. Using the test word file (link) you can choose a bullet point style and use the information here. You can also control the indentation of that style.

Similar to the Word and PowerPoint options, you can find and select other templates for the HTML outputs here.

If you change to a new template or change the bullet point information, you should Apply those changes using the button.

Once complete, you can close the Window.
Comments
Themes, Styles and Templates are powerful, but can be complex. Please reach out to Runthru support if you need assistance.
For assistance with templates used in Integrations such as SharePoint please contact us.