
When needed Runthru Instruction makes it easy to replace the background images on image frames. There are multiple options you can use to replace the background image
Replacing Background Images Using Snap Tool
A very useful tool in Runthru Instruction is the Snap Tool's Replacement Mode. This allows you to replace the underlying screenshot without having to redo any markup
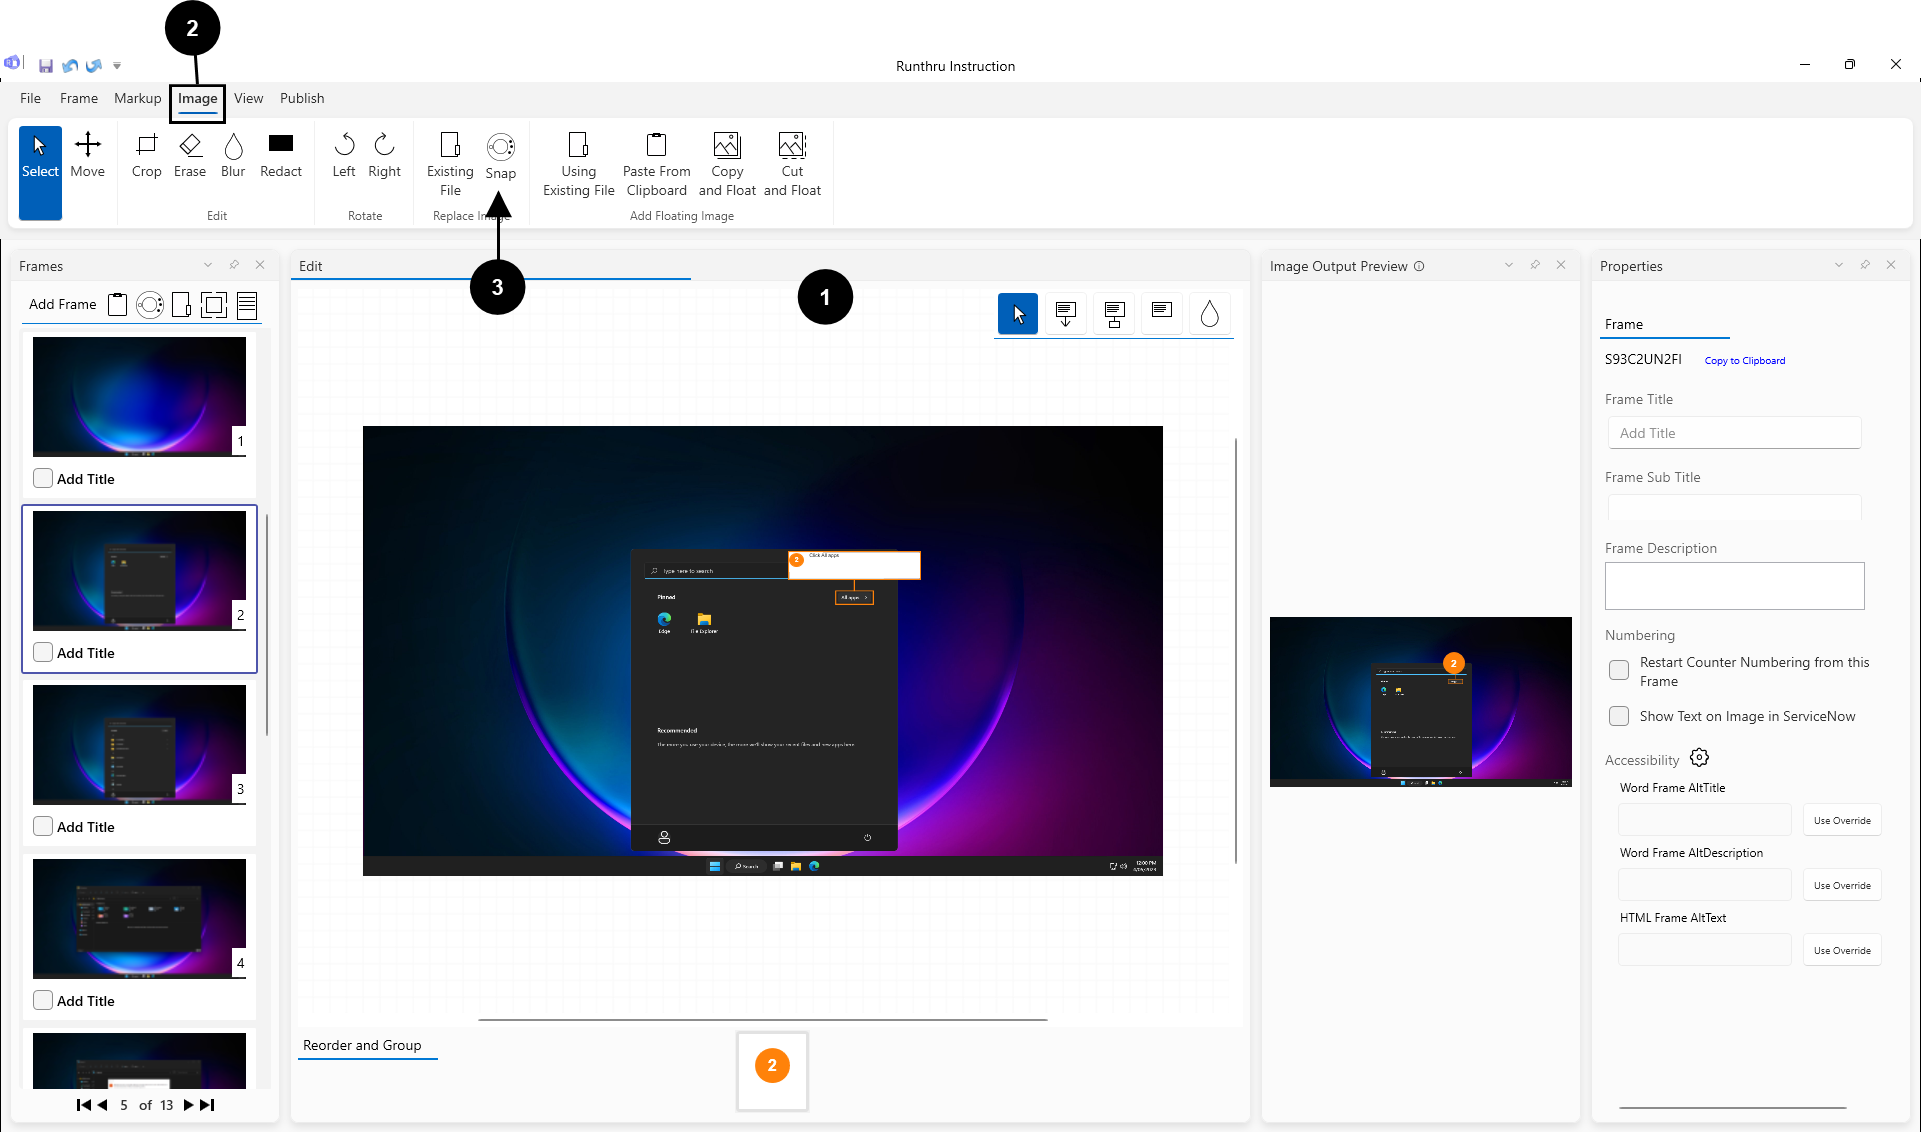

Go to the frame you wish to replace with a new image

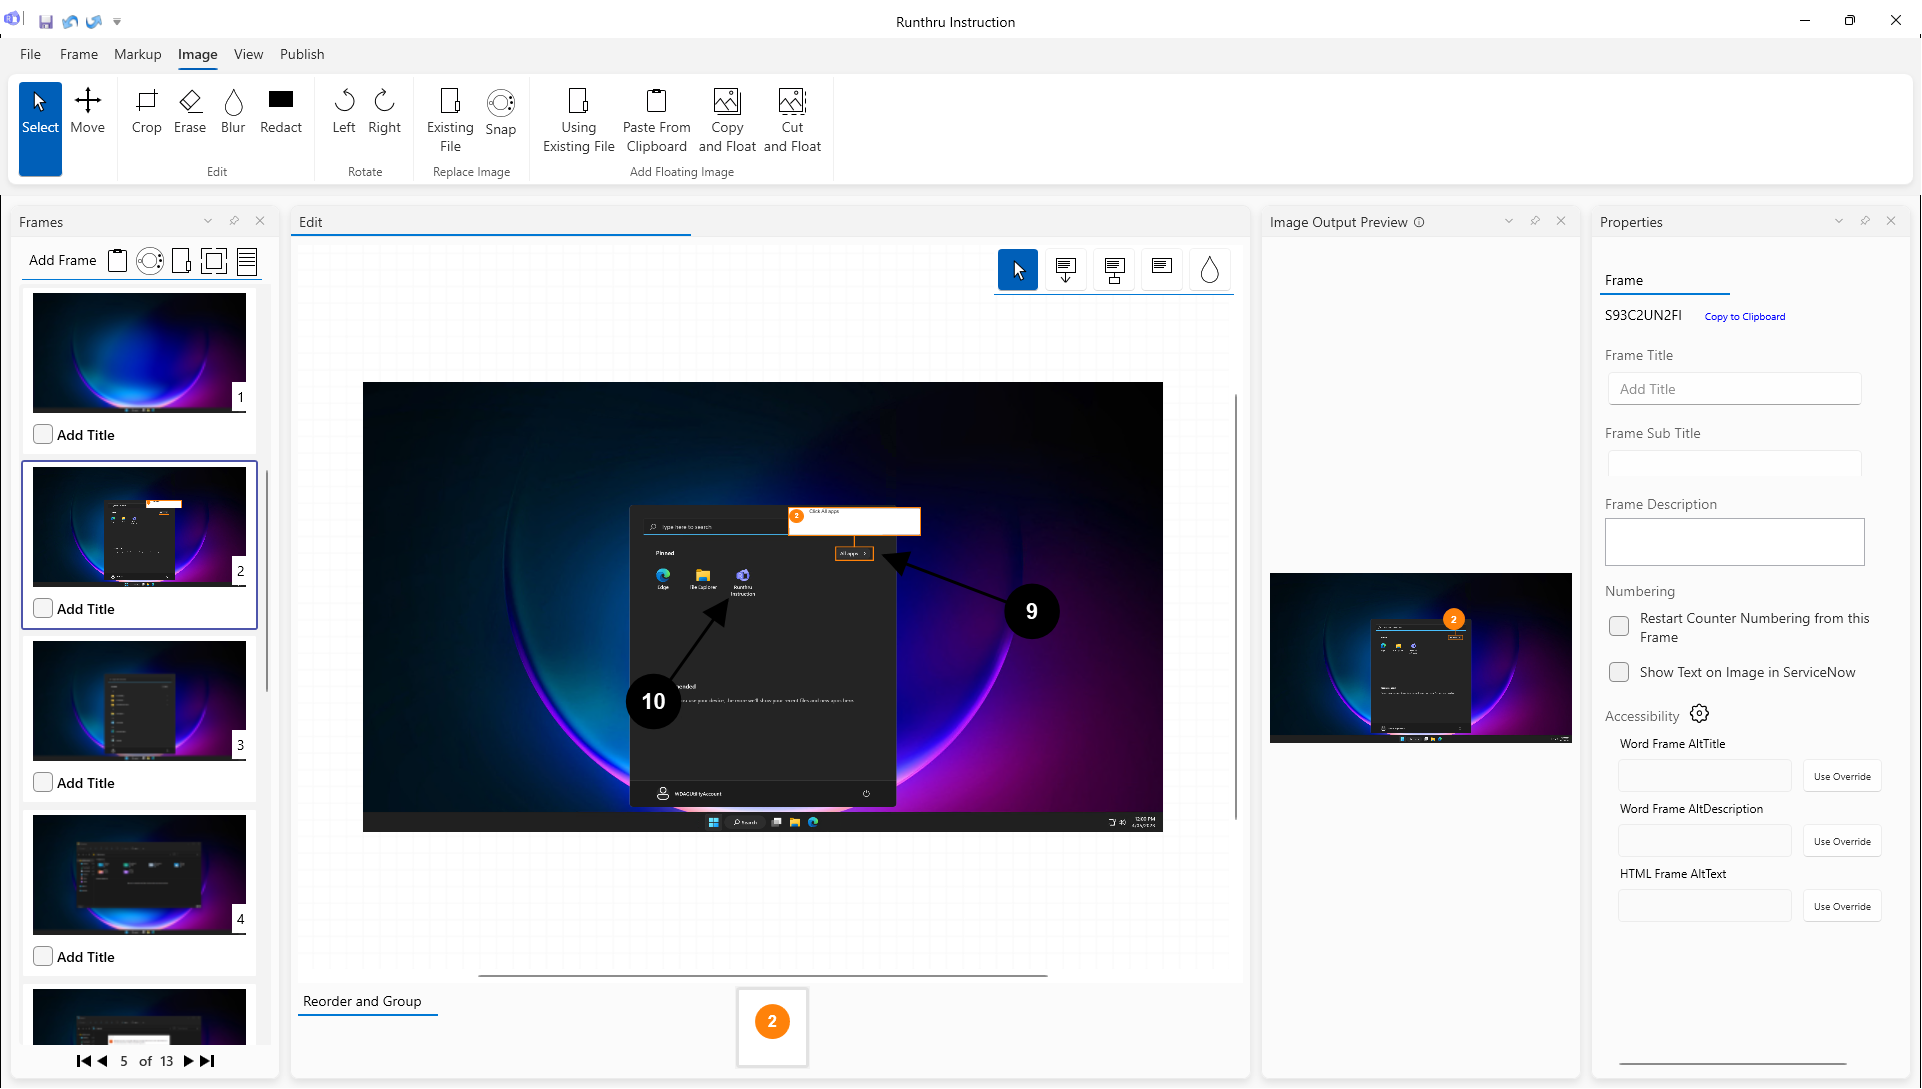
Go to the Image tab


To activate the Replacement Mode, click Snap Tool button
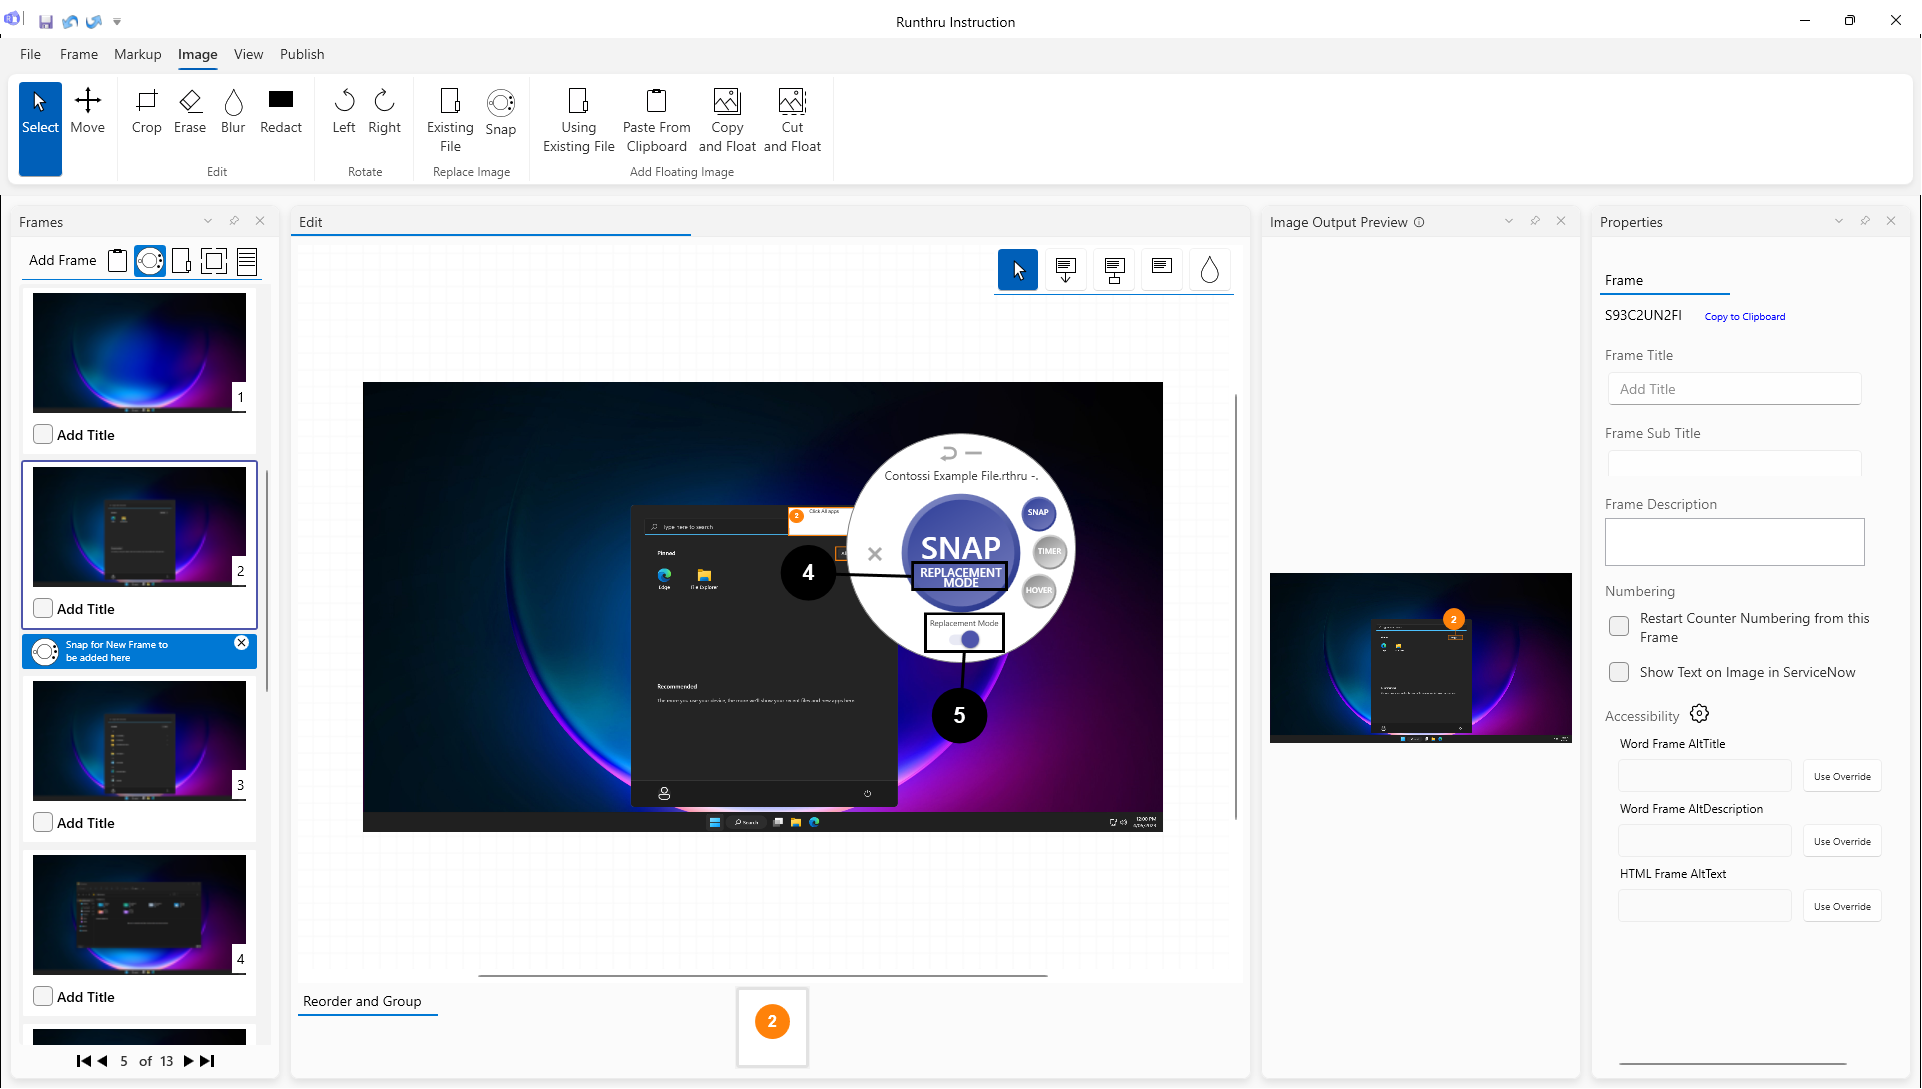

The Snap Tool will launch in Replacement Mode


You can also turn Replacement Mode on or off at any time using this switch on the Snap Tool


Go to the replacement window
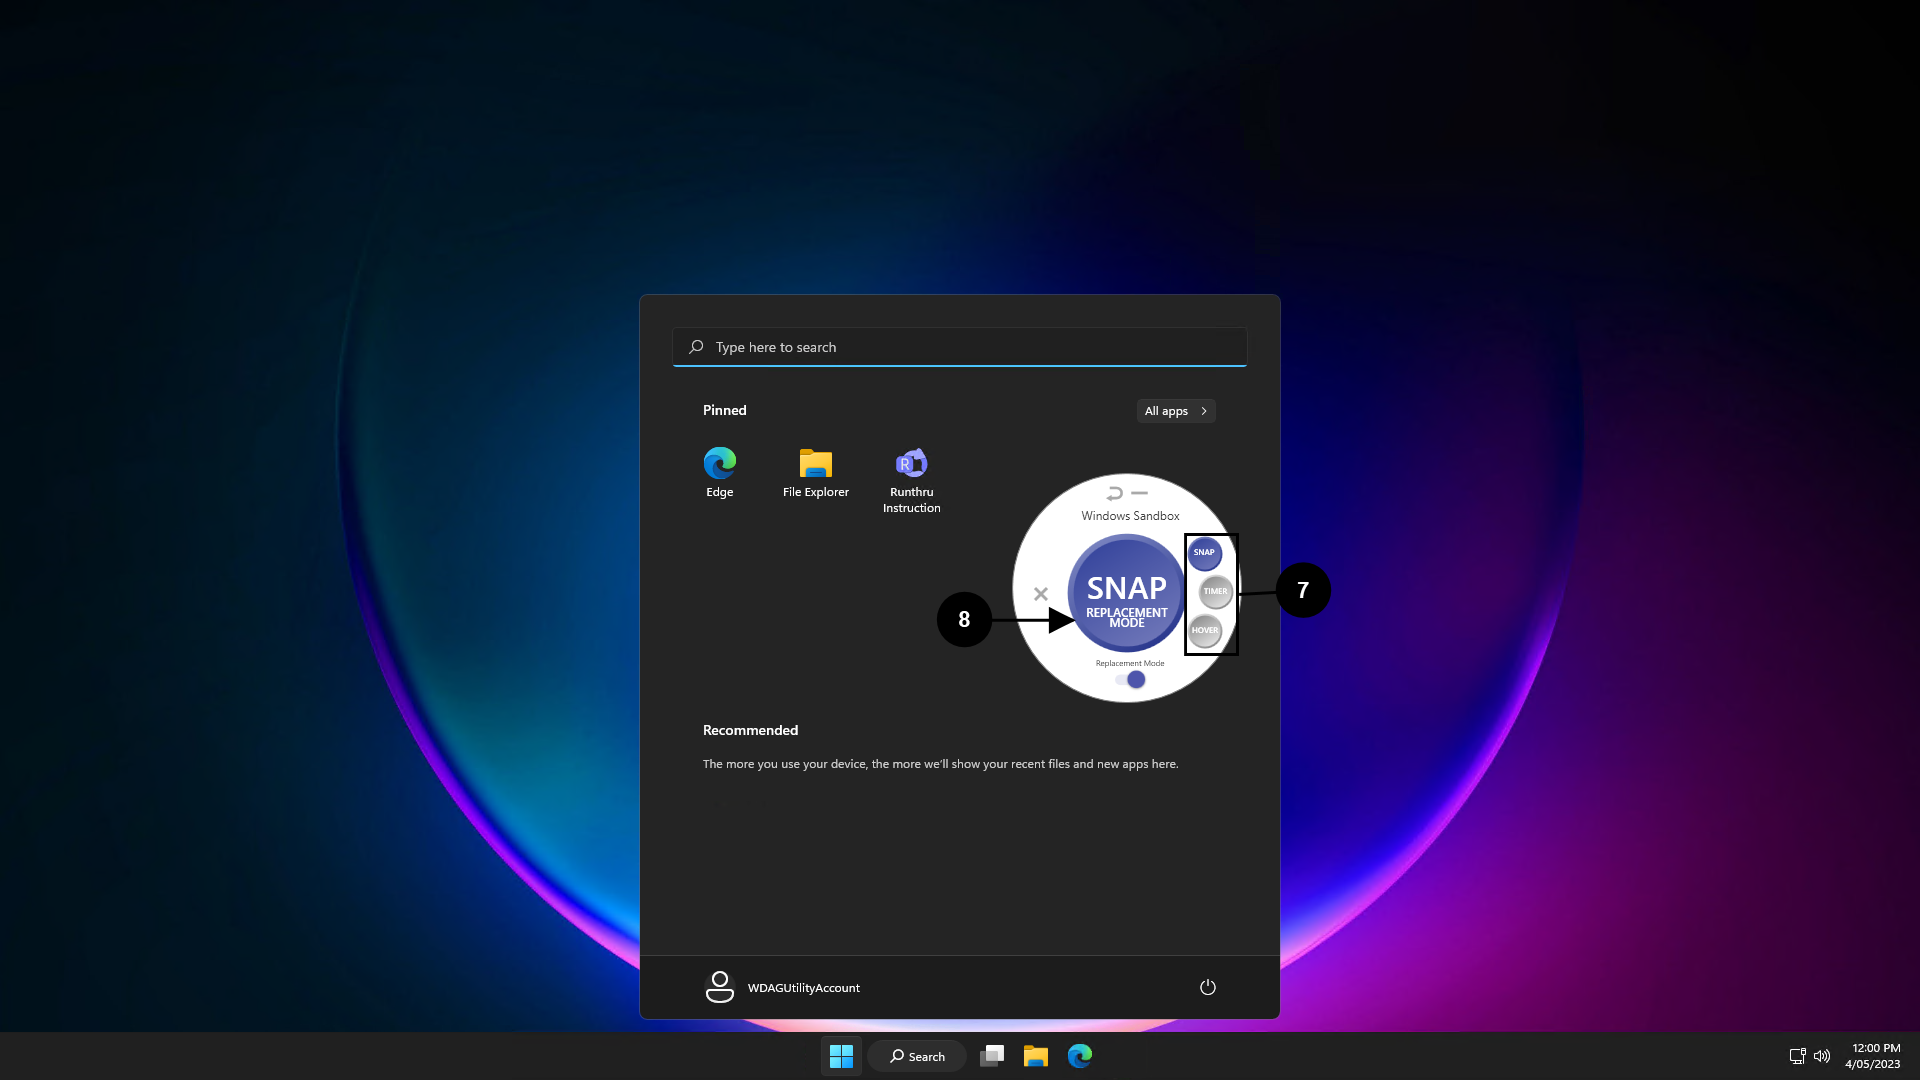

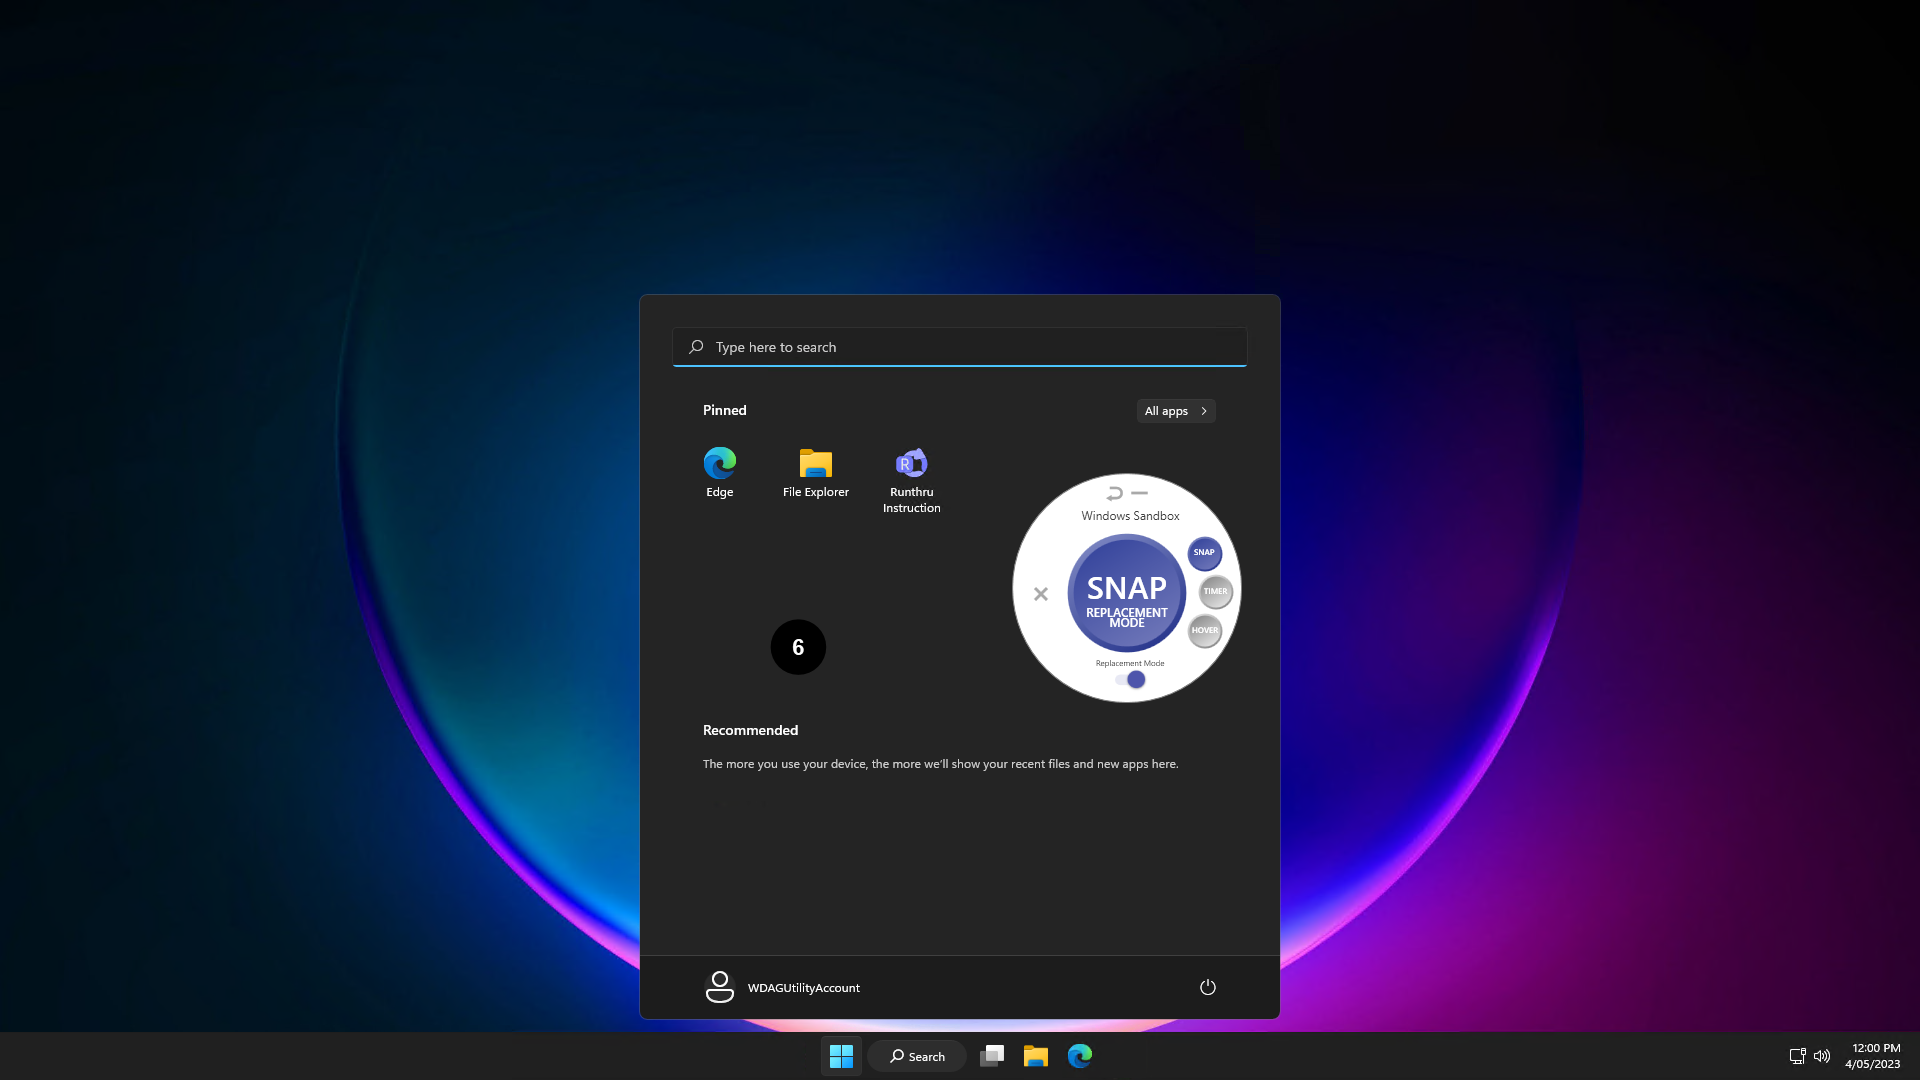
It is possible to capture a replacement of the background image using all of the Snap Tool options


Press the Snap button when you are ready to capture your replacement image

If the size of the Image is the same as the previous one, the Markup tools will stay in the same spot. If not, or if some UI items have moved it is really easy to just simply drag the markup to their new locations!

As shown, the image has been easily replaced
Replacing Background Images Using an Existing Image File
You can also replace the image through using an existing image file saved on your computer
Choose either of these options to change the image without changing the markups

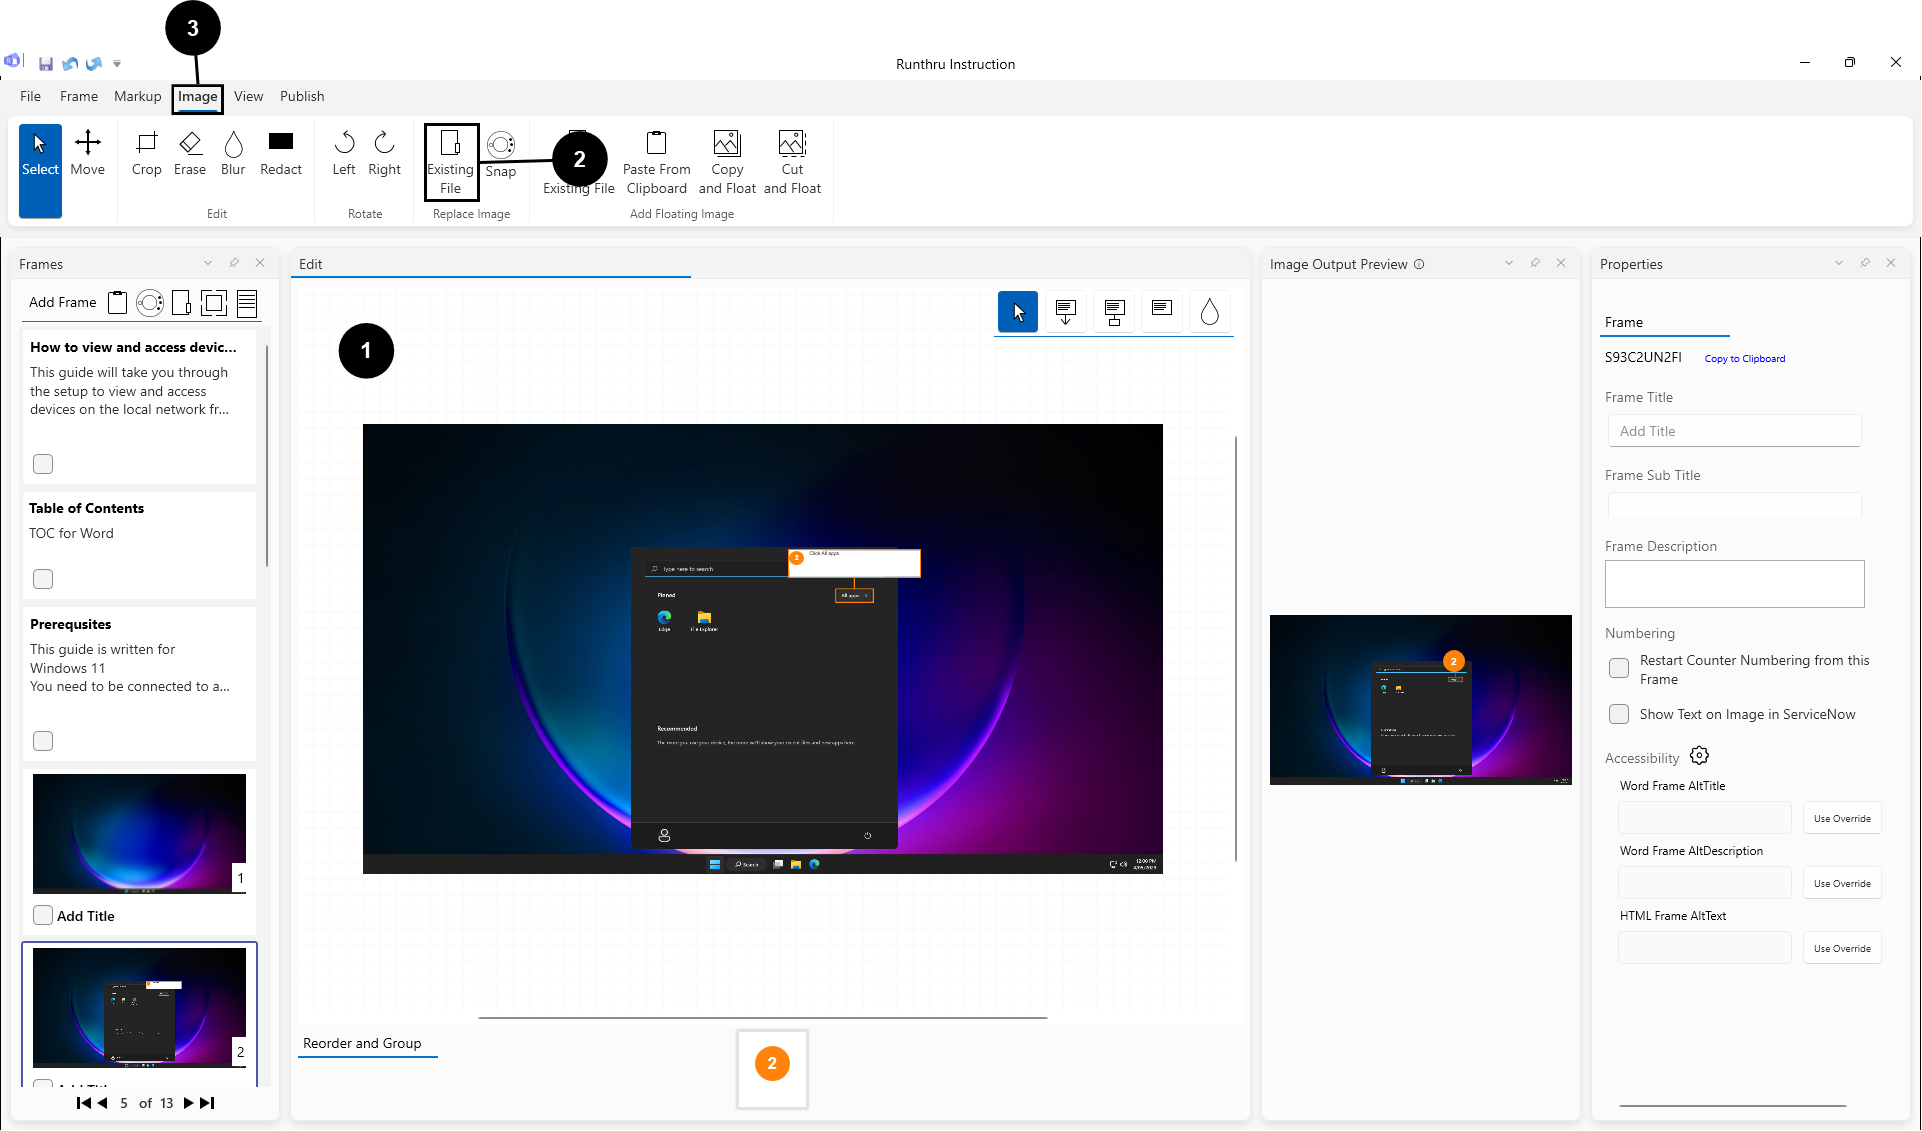
Go to the Image tab

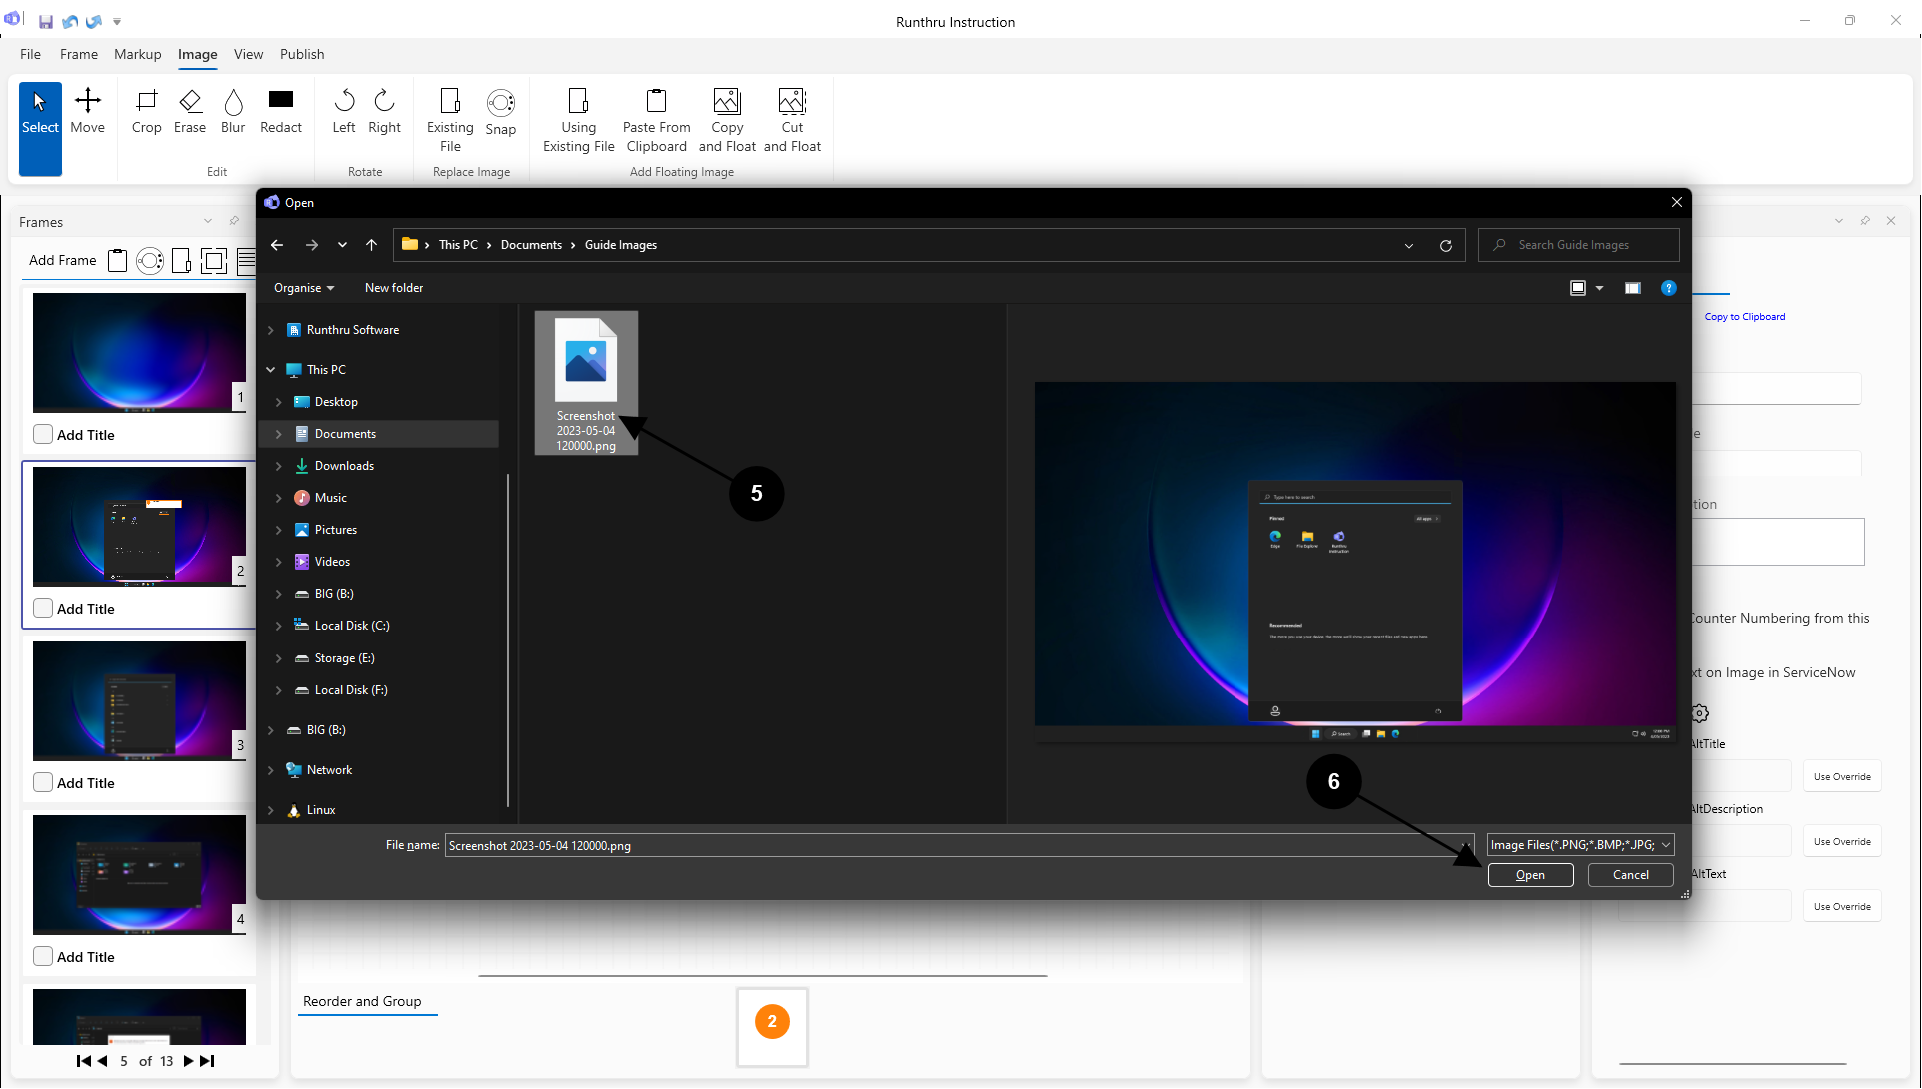
A Windows open file dialog box will appear
Find and select the image you want to use to replace the background with
Click 'Open' to replace the image.

As shown, the image has been easily replaced