
Changing the Confluence Template
This is a brief article that explains how to edit the Confluence template in Runthru Instruction. We suggest contacting Runthru Support for assistance with this task as it's not designed for customer editing. Note that a knowledge of HTML would be very helpful to perform this work.
Template Information
Find the file called MetaDataOutputContent.xml in Documents/Runthru/Templates/[Template Name]/Confluence.
This is the template used for Runthru's creation of Confluence pages.
You can open this file in a text editor. Although this is editable in notepad, we suggest using notepad++ or another editor that can provide visual clarity of the document structure. We will use notepad++ for this article, plus a plugin called XML Tools, and it's feature Print Pretty to make the content easier to read and edit.
Important information
Before we start, here is a quick but important piece of information as to how Runthru Confluence templates work with Runthru Instruction files.
When you create a new Runthru Instruction file using a Theme (double clicking on the company icon in the starting window of Runthru Instruction) it takes a copy of the Runthru Confluence template from the Theme, and from then on, will only use that copy that it has stored inside its own file structure. In other words, when you publish to Confluence from your Runthru Instruction file, it will not 'see' any changes that you make to the file in the Theme.
Later in this article we will show how to import a changed template from the theme or elsewhere.
Procedure

Locate MetaDataOutputContent.xml in Documents/Runthru/Templates/[Template Name]/Confluence and open it in a text editor.

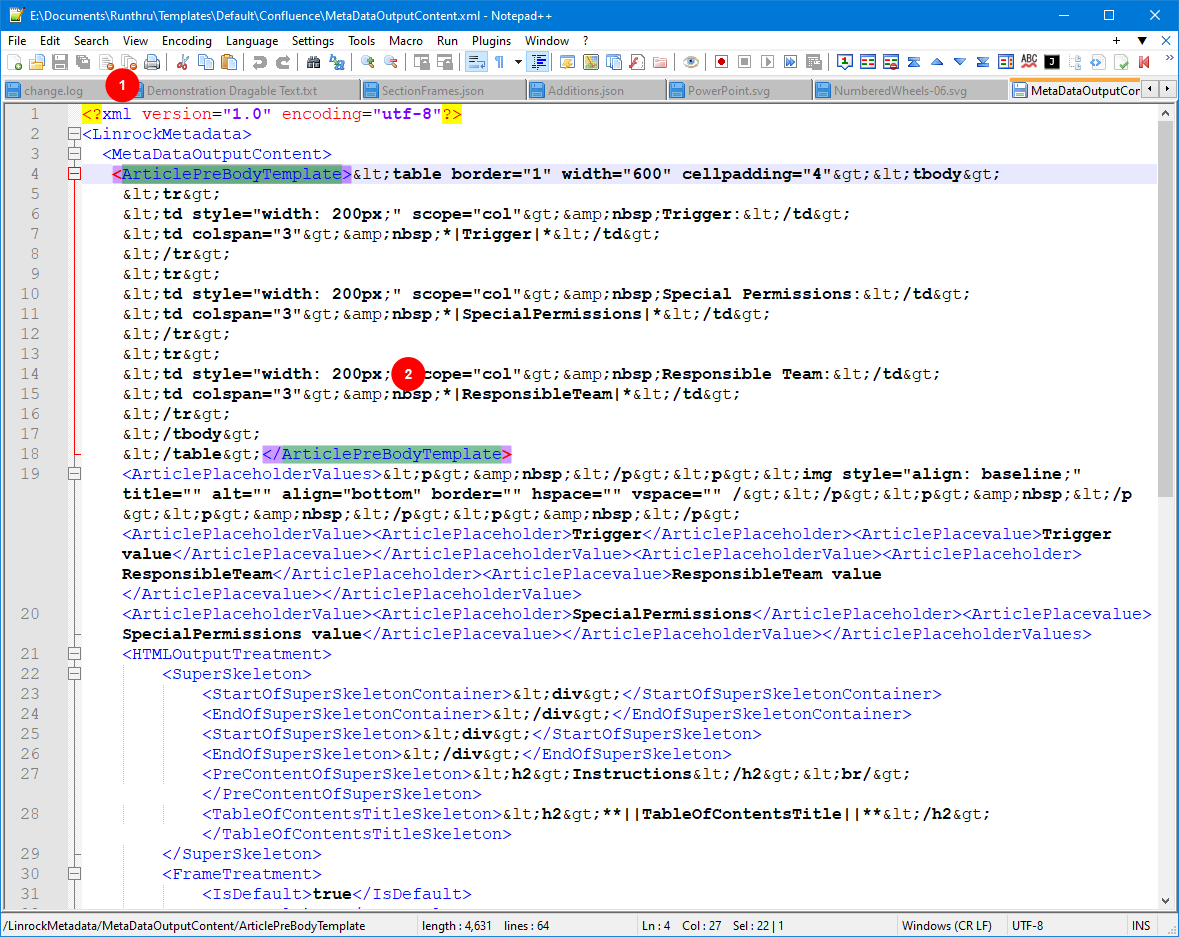
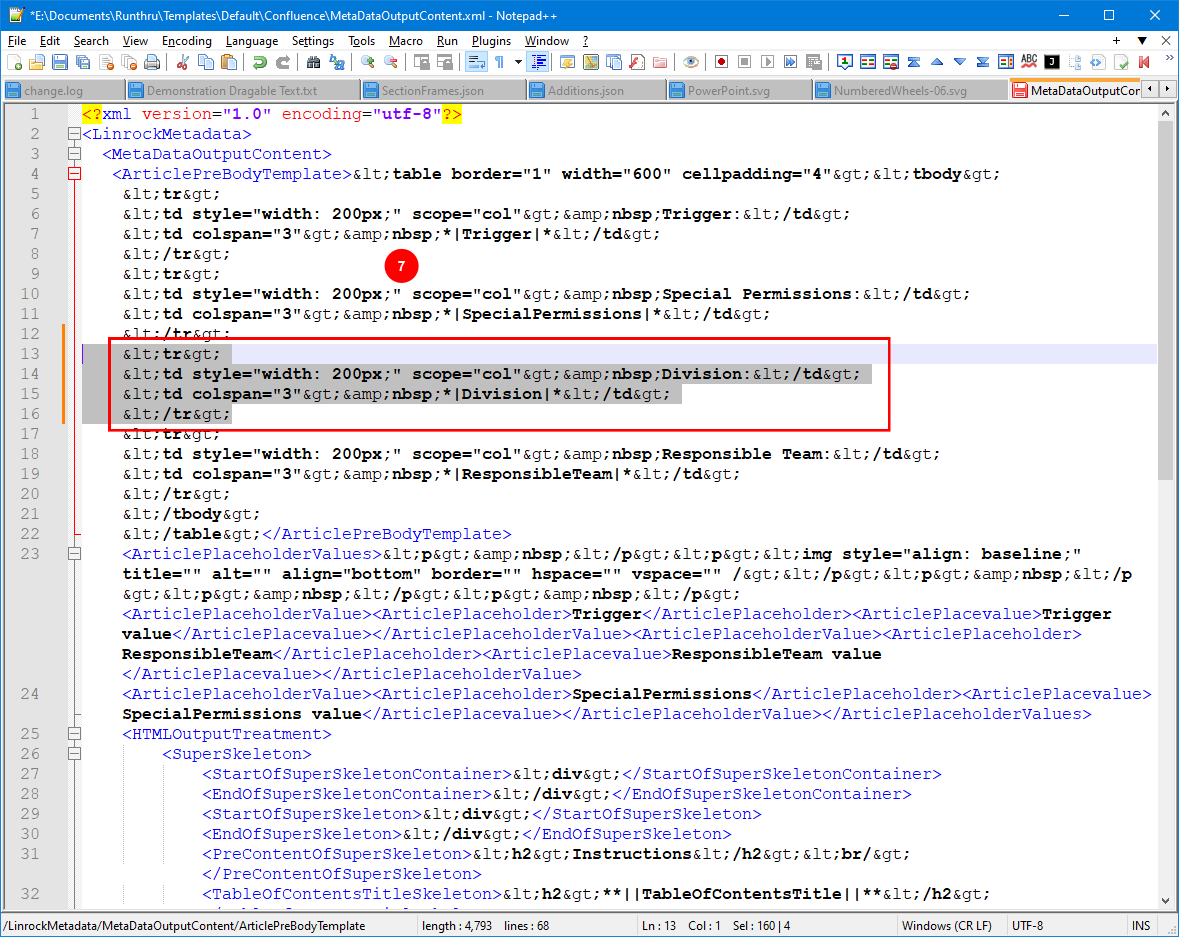
Here is the file opened in notepad++.
It shows xml tags surrounding blocks of encoded content.
The selected tag in this image is
It contains an encoded HTML table that is used to render the table at the top of a Confluence page.
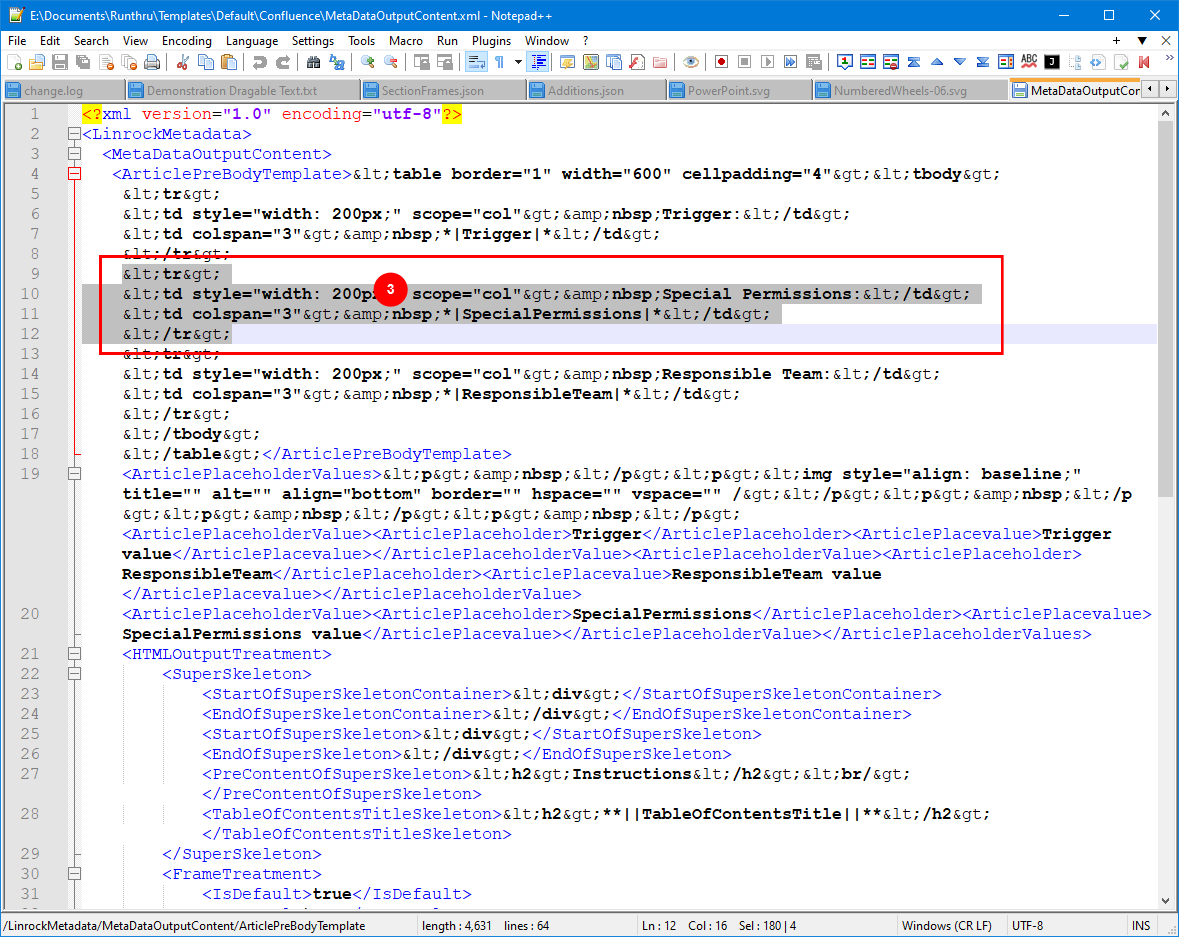

The selected text in this image shows a single row in the table.
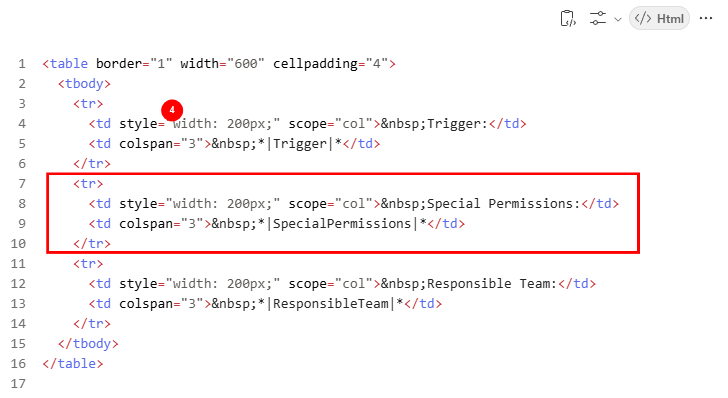

This image is for reference only. When that code is processed, it produces this HTML. The highlighted area is a single table row (tr) with two cells (td)

The first cell of this table row contains the text Special Permissions:. The second cell contains the merge field using * | SpecialPermissions | * (without spaces).
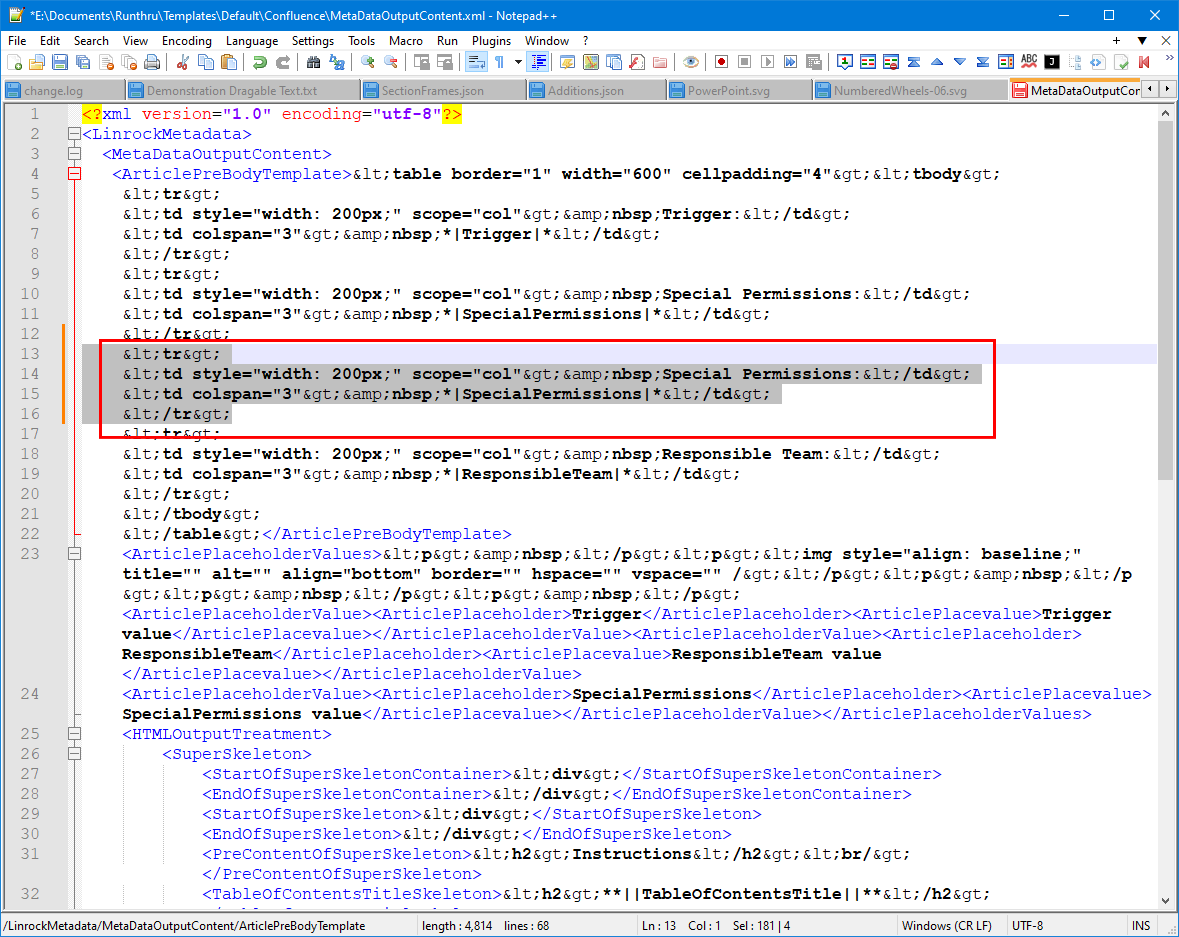
Now we'll edit the new row and use an example of a division in the organisation.

To add a new row to the table, you can duplicate the selected text in your editor, as shown in this image.

The new row shows the change of Division: and Division as the text and merge fields.
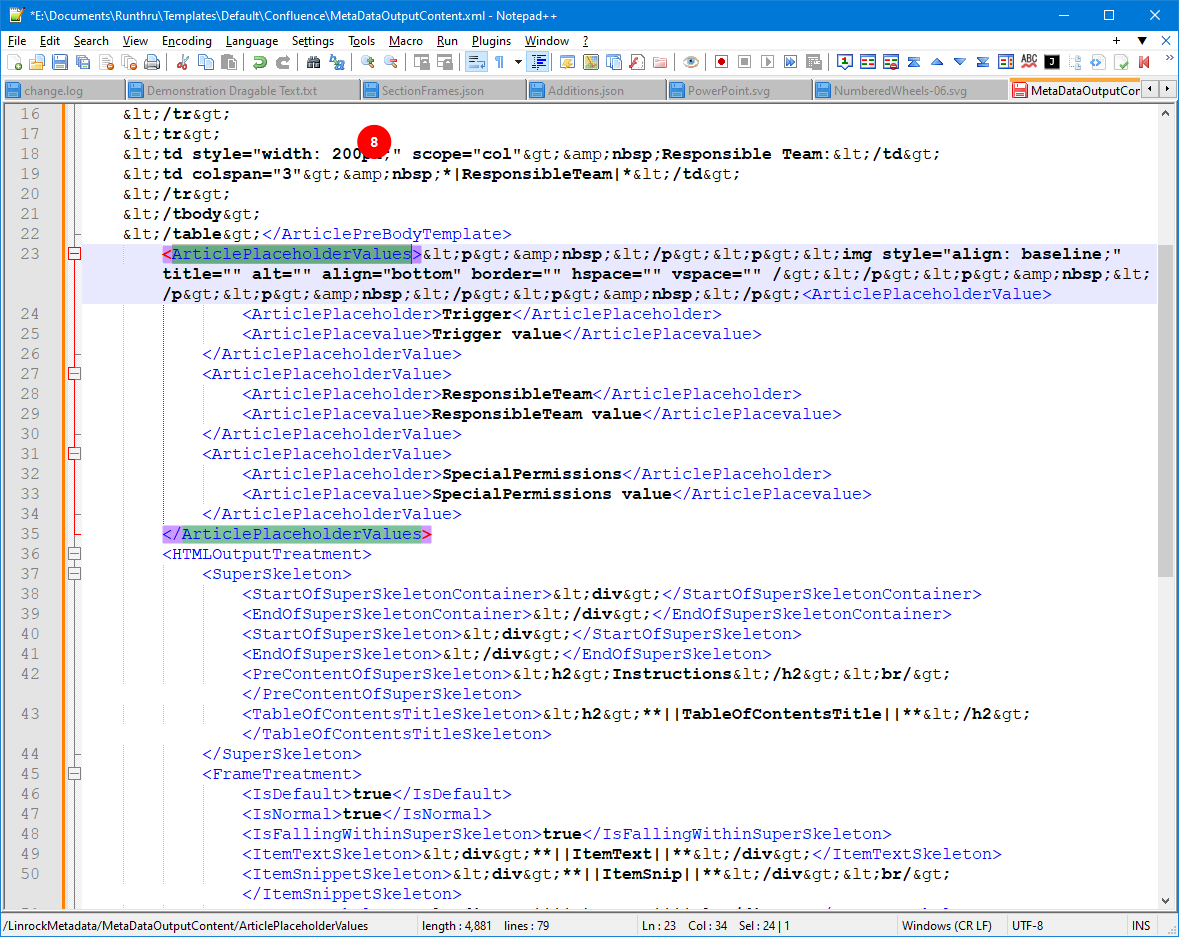

Now locate the ArticlePlaceholderValues section.
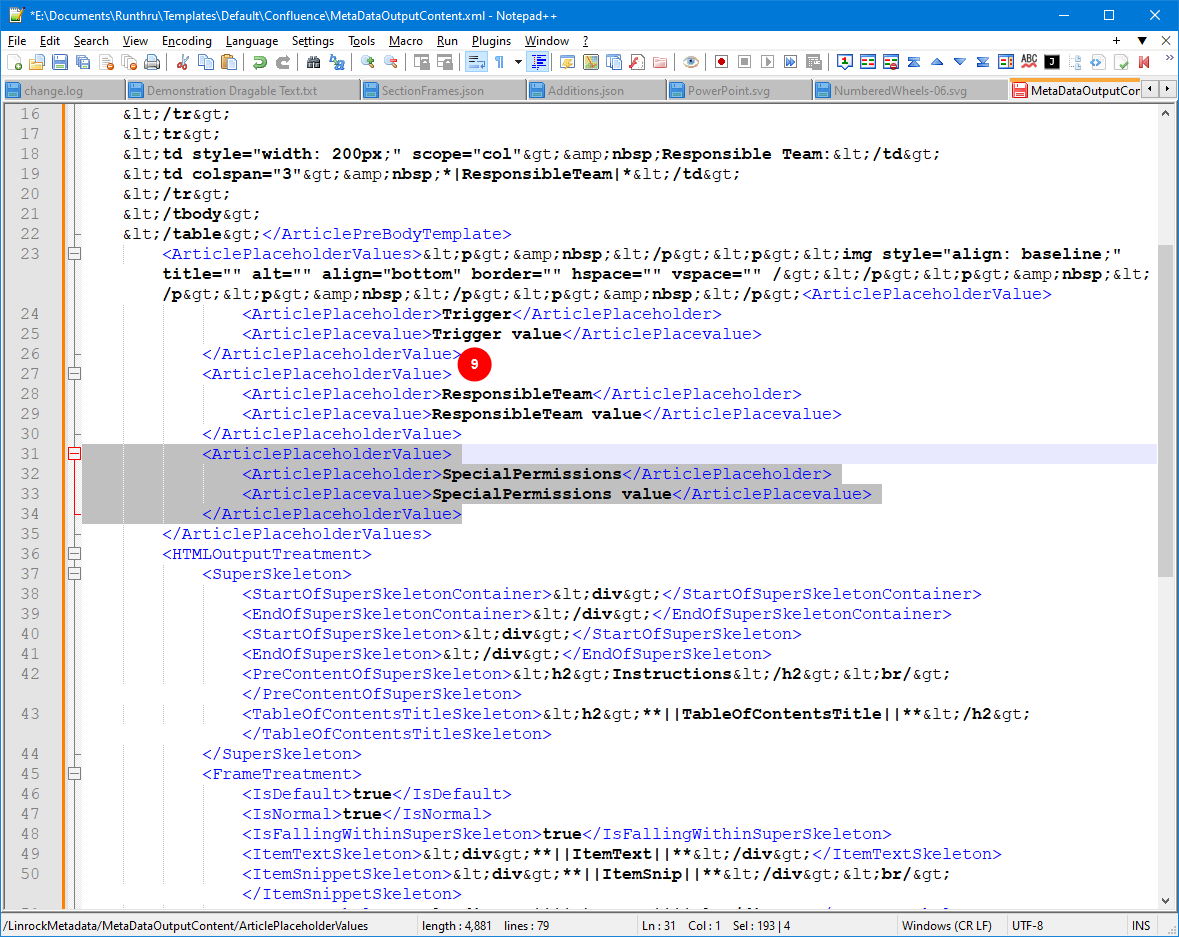

Now locate one of the sections called ArticlePlaceholderValue, and duplicate it.
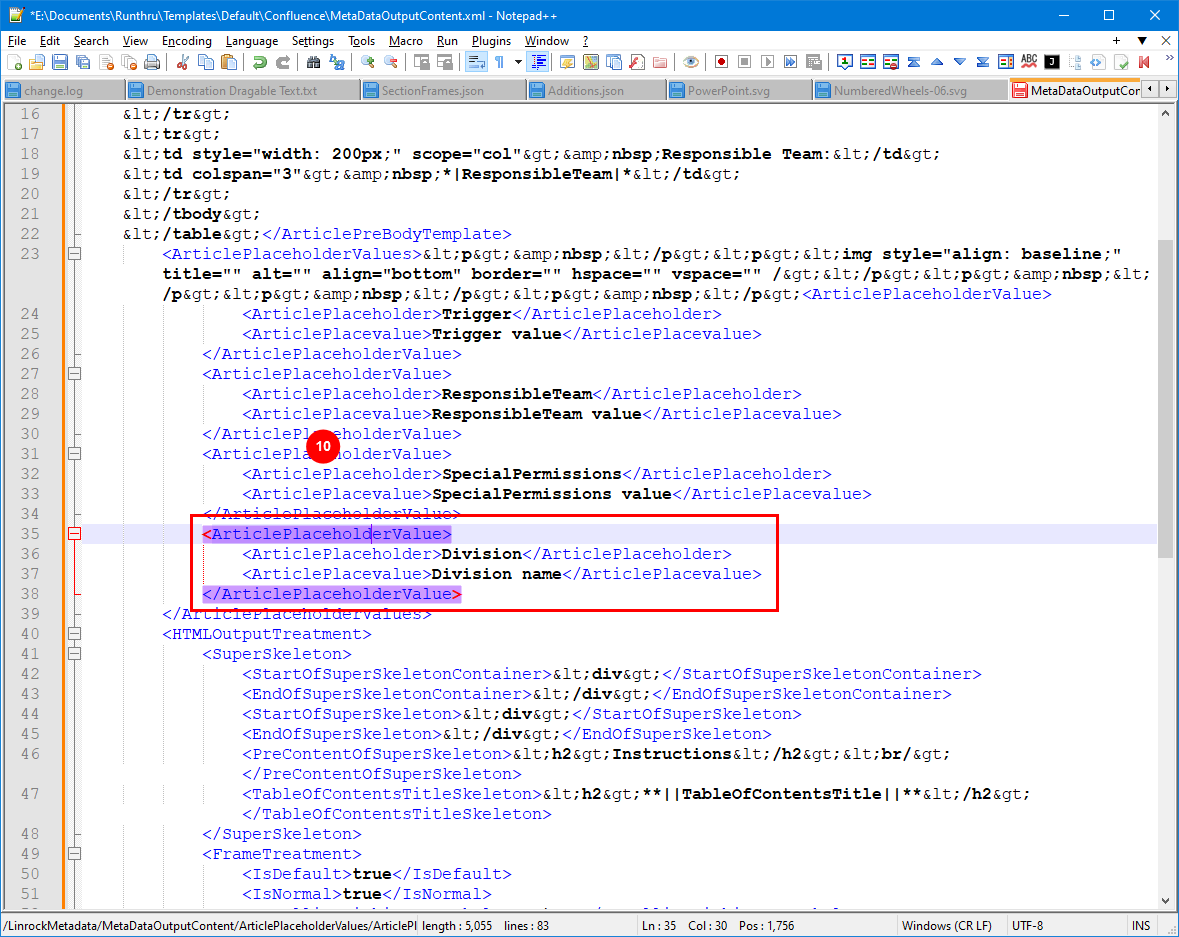

Change the ArticlePlaceholderValues as shown here.
Now save this file.
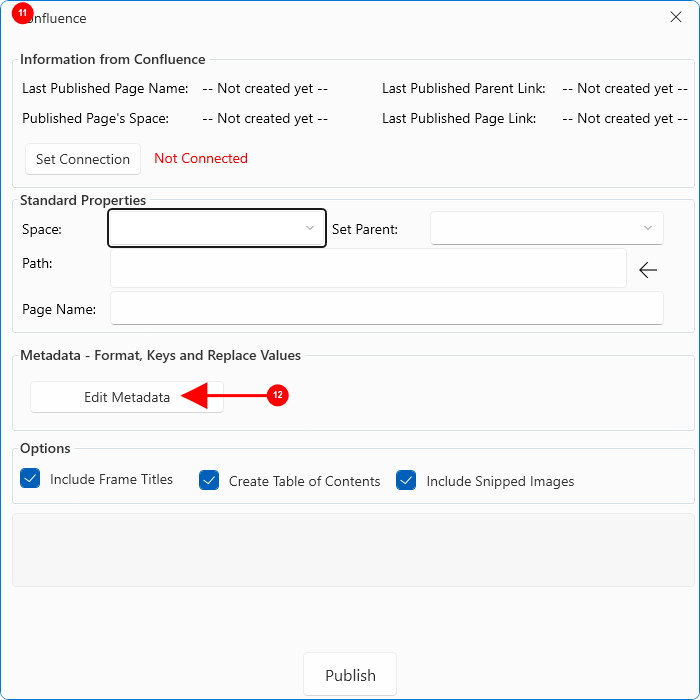

In Runthru Instruction, open the Confluence publish dialog. (Publish > Confluence)

Press Edit Metadata. If this is a new file created from the Theme go to Step 18, otherwise for an existing file, continue to the next step.

If this is a new file created with your theme, you will see your new values here.
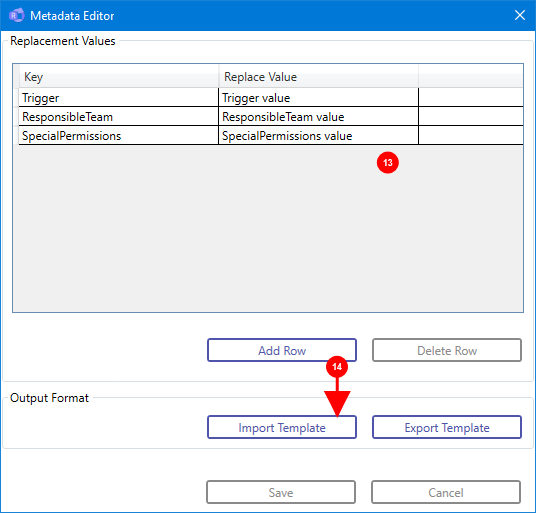
In this example we will assume this is an existing Runthru file and do not see the new values here.

Using Import Template, locate your recently changed XML file, and import it.
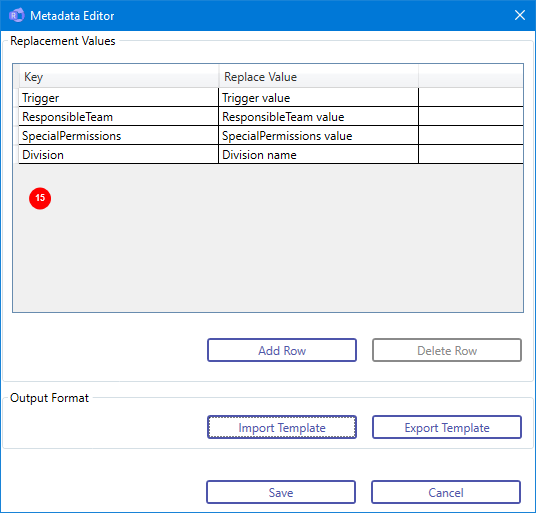

You should now see your new entry.

Your new values should now be shown.

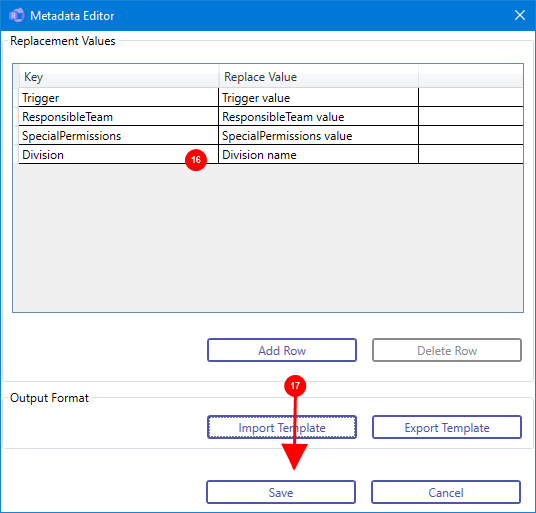
You must Save for the changes to be retained.
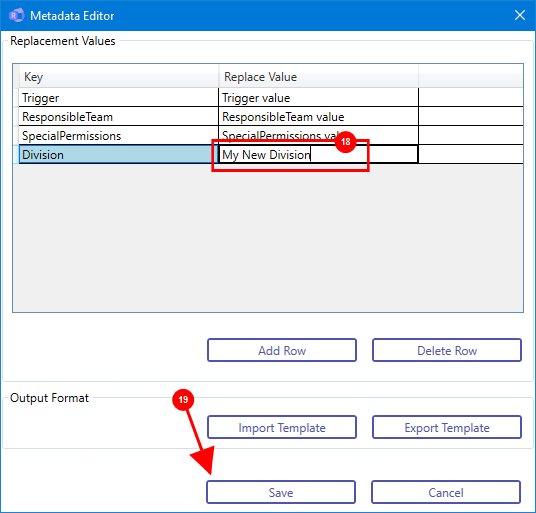

To change the value shown in your Confluence page, edit the value here. Note that you must save this for the information to be retained.

Press the Save button to save your changes. Note that if the Save button is disabled you will need to defocus the text field by clicking into another text field on this window.
Finally
You're next publish to Confluence should now show your changes.
Please make sure you save the Runthru Instruction file.
That's the end of the procedure. If you have any questions please contact [email protected]